
AI tools are not just for chatting. Many people want an assistant that can work in the background, automate tasks and save time every day. This is where you need to install OpenClaw on Windows 11. It can connect you with apps like Gmail, Slack, GitHub, Telegram and WhatsApp to handle repetitive tasks automatically.
So, if you want to turn your Windows 11 PC into an AI-powered automation assistant. Below are the steps for installing OpenClaw using PowerShell or WSL.
What Is OpenClaw?
OpenClaw is a self-hosted AI assistant. It runs locally on your PC or inside a cloud environment. It’s not just like any regular AI chatbot. OpenClaw works continuously in the background and performs tasks automatically.

You can connect it with AI providers like OpenAI or Anthropic using API keys.
Guide: Install OpenClaw On Windows 11
Method 1: Install OpenClaw On Windows 11 Using PowerShell
First is the easiest installation method for Windows 11 users.
Step 1: Open PowerShell as Administrator
Open Start, search for PowerShell, right-click it, and choose Run as administrator.
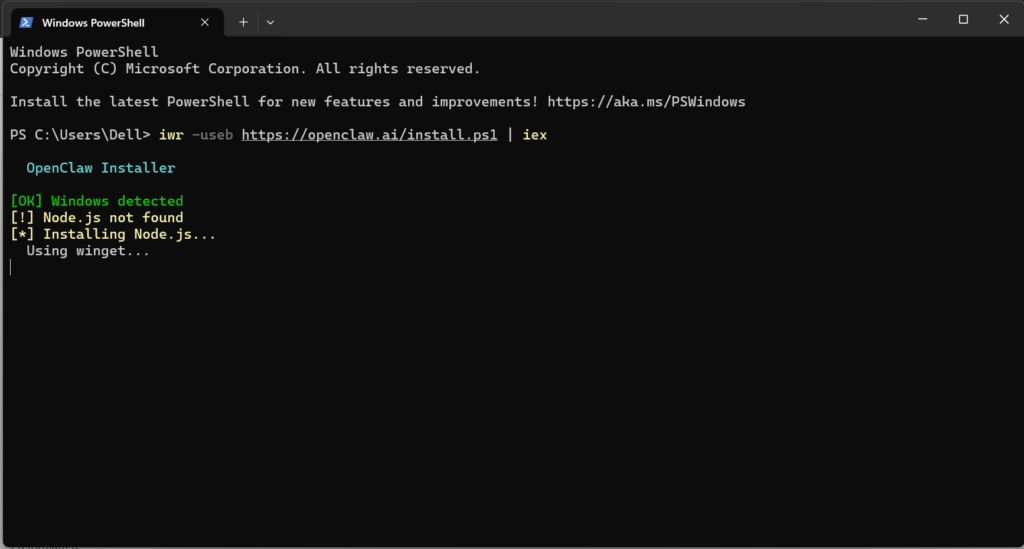
Step 2: Run the Installation Command
Type the following command and press Enter:
iwr -useb https://openclaw.ai/install.ps1 | iex
Step 3: Complete the Setup
During setup:
- Allow the security prompt.
- Select QuickStart mode.
- Choose your AI provider.
- Enter your API key.
- Pick the default AI model.
- Keep the default gateway settings.
- Generate the access token.
- Select channels like Telegram or WhatsApp.
- Install required skills if needed.
Finally, you can enable the OpenClaw gateway service and finish the onboarding wizard.
Method 2: Install OpenClaw Using WSL
If you already use Linux tools on Windows 11, this method works well.
Step 1: Open WSL
Launch your installed Linux distro, such as Ubuntu.
Step 2: Run the Install Command
Enter this command:
curl -fsSL https://openclaw.ai/install.sh | bash
Step 3: Finish the Configuration
The setup process is almost identical to the PowerShell method. You must:
- Confirm security access.
- Select an AI provider.
- Add API keys.
- Configure skills and hooks.
- Enable the gateway service.
OpenClaw System Requirements
Minimum Requirements
- Windows 11 22H2 or later
- 8GB RAM
- Modern dual-core CPU
- 4GB free storage
Recommended for Local AI Models
- 16GB to 32GB RAM
- NPU-enabled processor
- 40GB free storage
Important Security Tips To Install OpenClaw On Windows 11
- Since OpenClaw can access your apps and accounts, always protect your API keys and tokens.
- Only connect services you truly need and review permissions carefully before enabling automation.
Leave a Reply