

There are several ways to change the DNS server in Windows 11, such as through Settings, Command Prompt, PowerShell, and Control Panel. Changing DNS settings could be handy if you want to use a faster DNS service. Or you can use it to troubleshoot your Internet connection, or set up a private and more secure DNS service.
Let’s see how to configure Private DNS in Windows 11 with these four simple methods.
Ways to Configure Private DNS in Windows 11
Understanding how to set up Private DNS in Windows 11 provides you with more control over your computer’s network setup. Use one of these methods at a time, according to your choice.
Method 1: Configure DNS Through Windows 11 Settings
The Settings app is the simplest way to modify the DNS servers on Windows 11.
1. Open Settings by pressing Windows + I. Go to Network & internet > Wi-Fi or Ethernet (as appropriate).
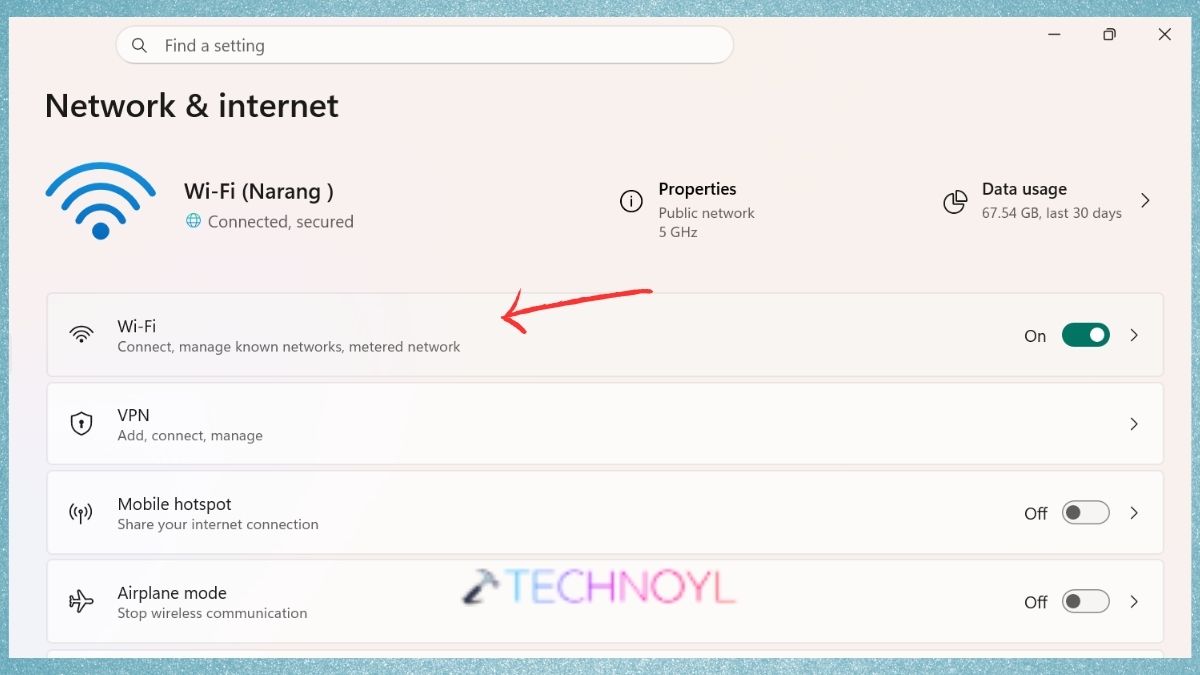
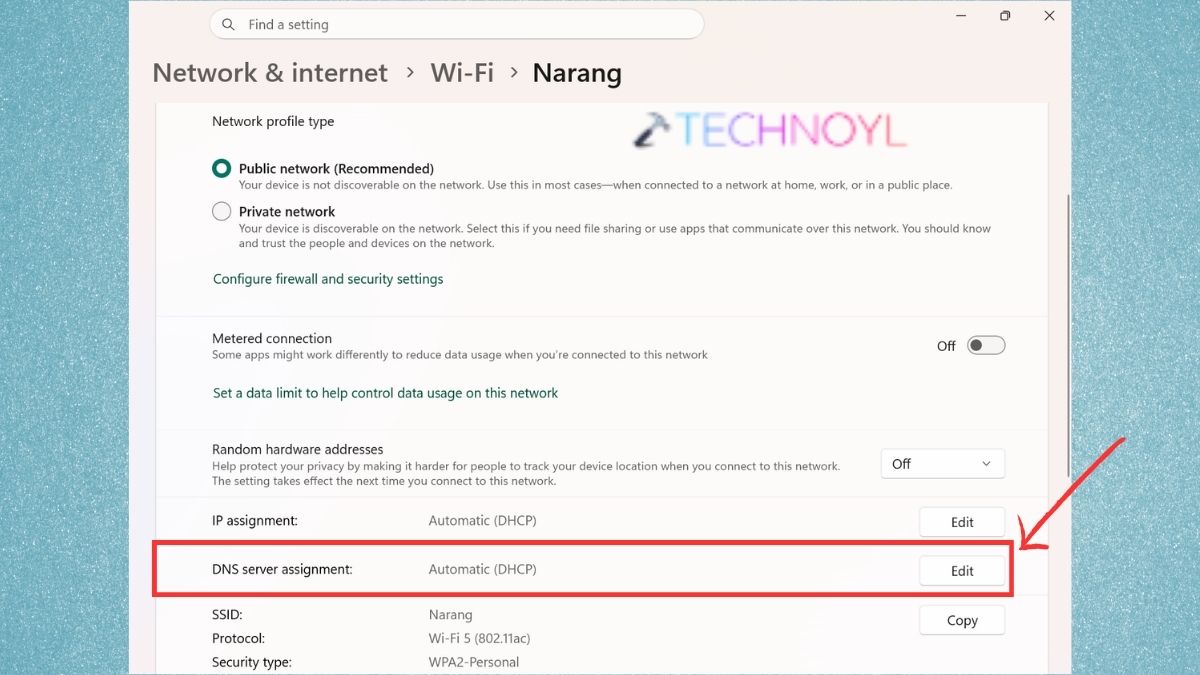
2. Choose the network that you are connected to. Locate DNS server assignment and tap Edit.
3. Change Automatic (DHCP) to Manual. Turn on IPv4. Enter the DNS server you want to use in the Preferred DNS box. Use an Alternate DNS for an alternate server. Click Save.
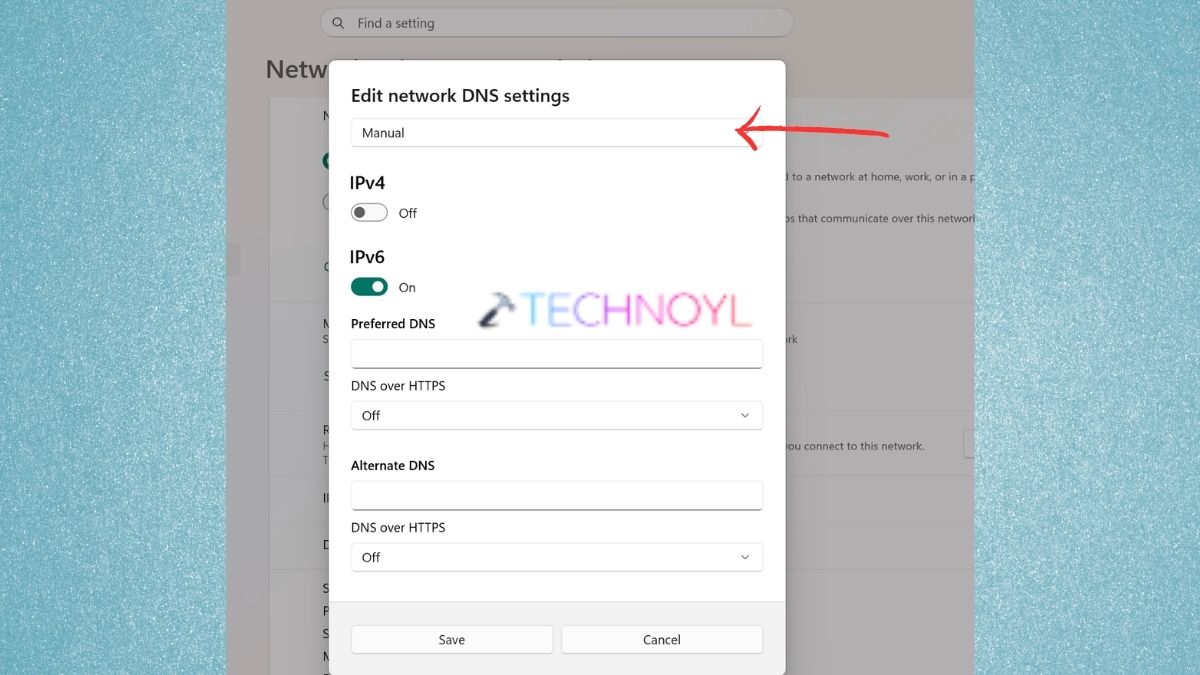
If your network is based in IPv6, it’s also possible to set up a IPv6 DNS.
Method 2: Change DNS Servers From Control Panel
While many network options has been imported to the Settings app, Control Panel still has access to the traditional DNS configuration.
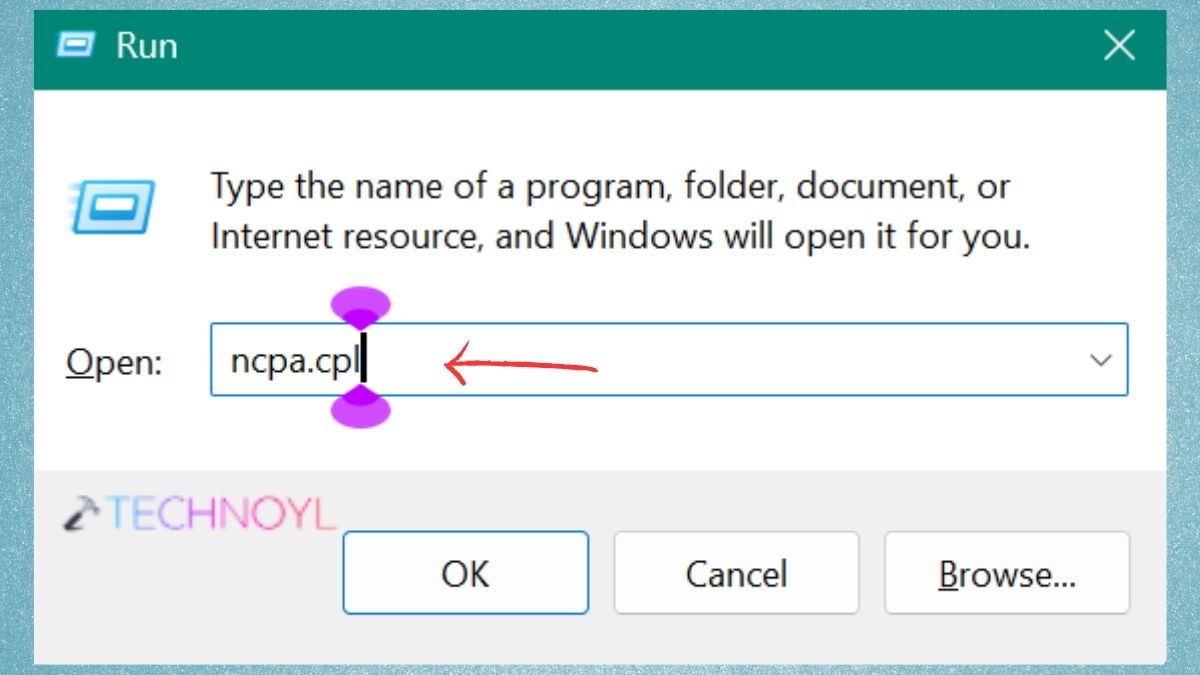
1. Press Windows + R. Type, and then press Enter.
ncpa.cpl
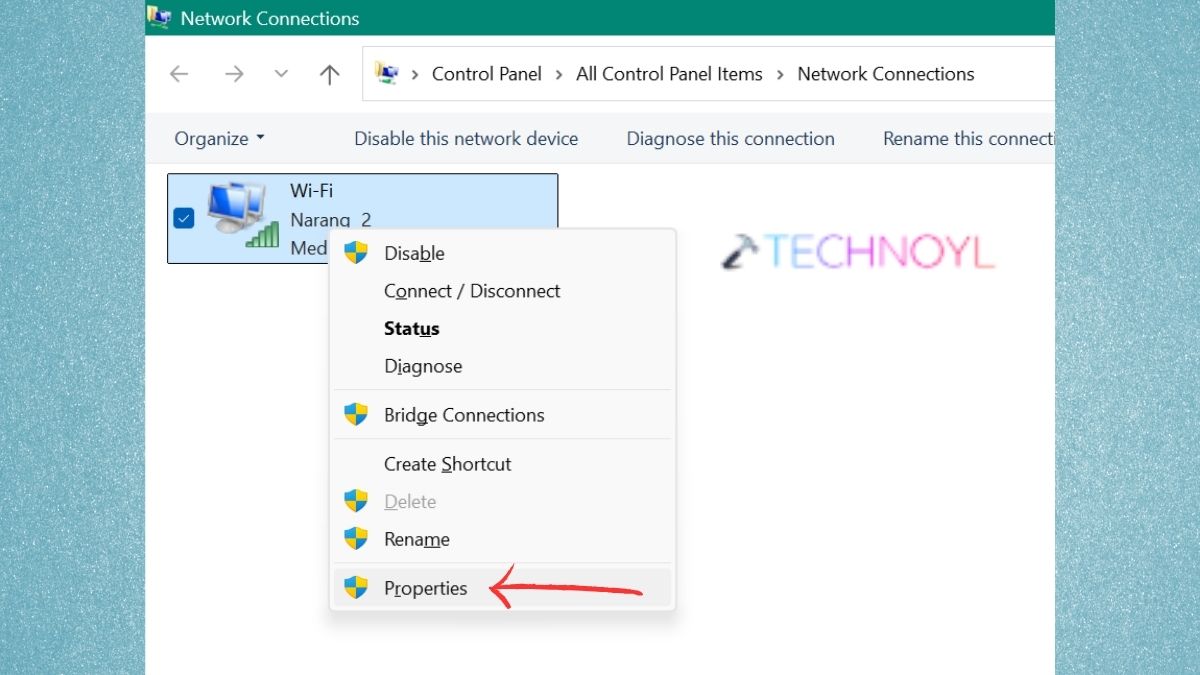
2. Right-click on the network connection you’re connected to. Select Properties.
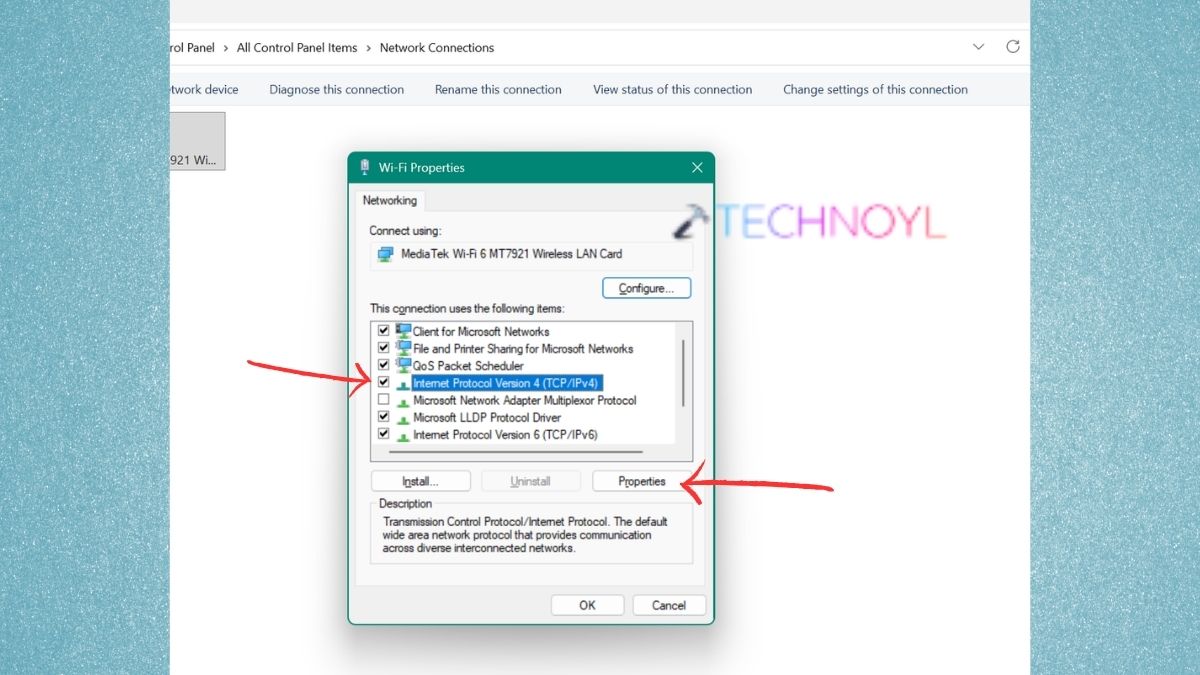
3. Double-click or choose Properties for “Internet Protocol Version 4 (TCP/IPv4)”.
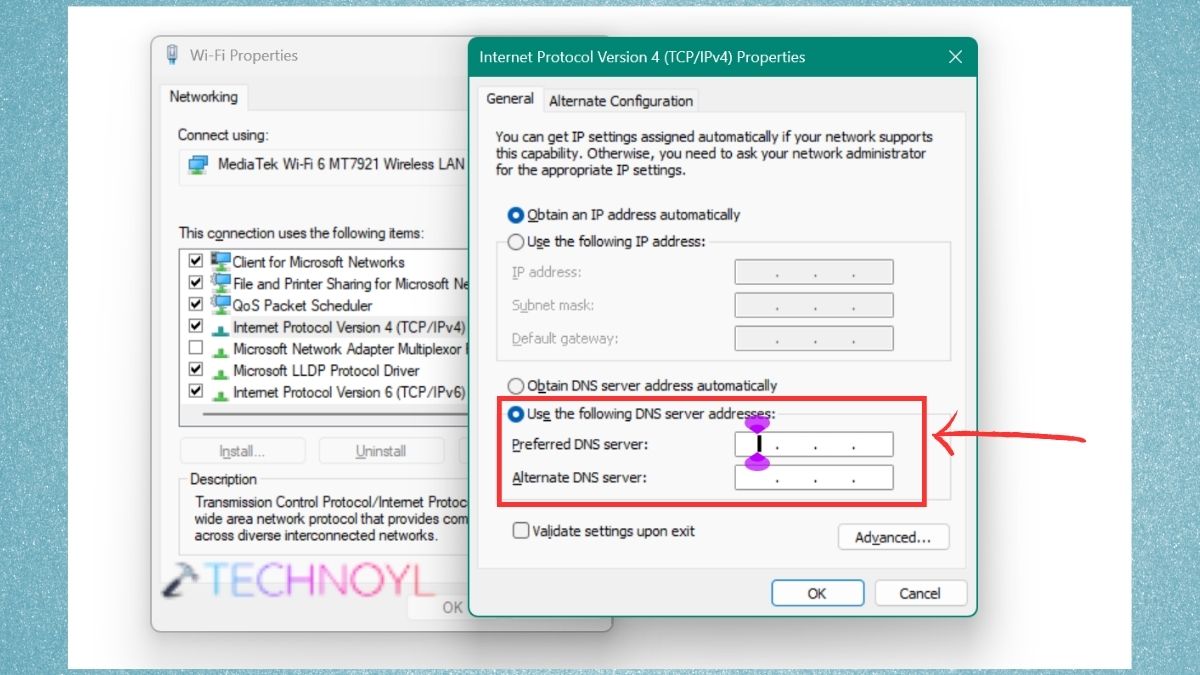
4. Click on “Use the following DNS server addresses”. Enter the domain name server that you want to use and the secondary DNS server. Click OK and Close.
In the case of IPv6, repeat the procedure by using Internet Protocol Version 6 (TCP/IPv6).
Method 3: Change DNS Using Command Prompt
Use below mentioned steps to utilize Command Prompt to easily change DNS settings in Windows 11.
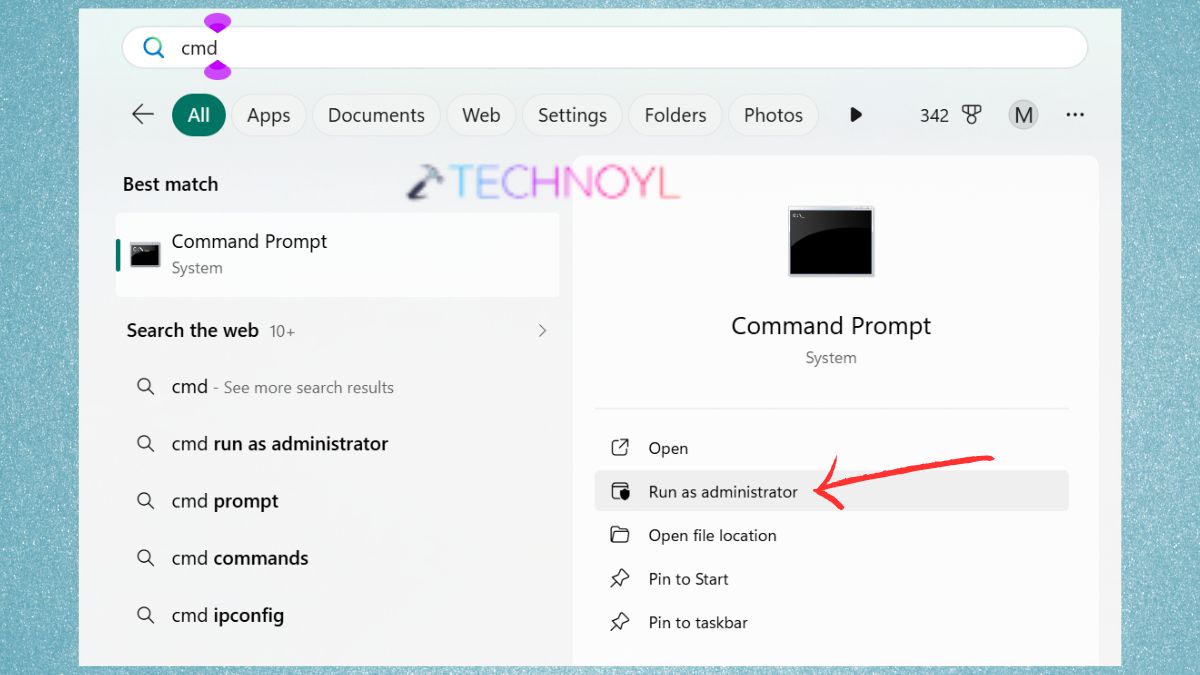
1. Find Command Prompt from Windows search, right-click, and choose Run as administrator.
2. Press Enter after typing the following command.
netsh interface show interface
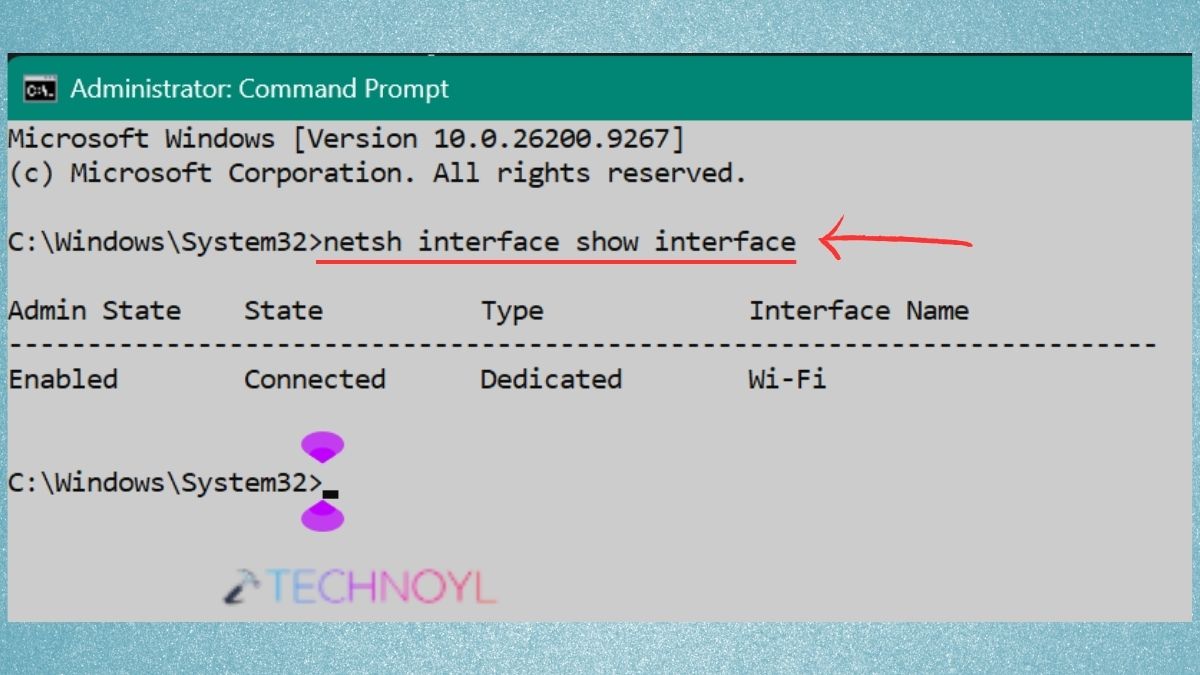
3. Find out the name of your currently active network adapter. Run this.
netsh interface ip set dns name="Wi-Fi" static
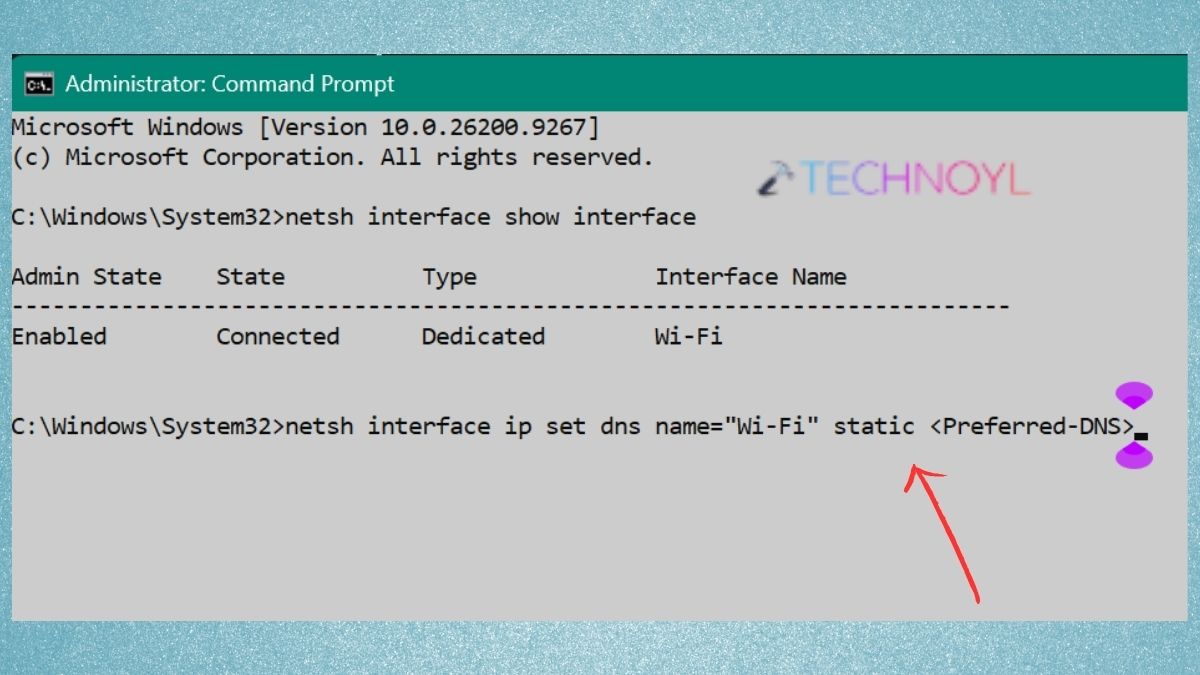
4. This command can be used to add an alternate DNS server.
netsh interface ip add dns name="Wi-Fi" index=2
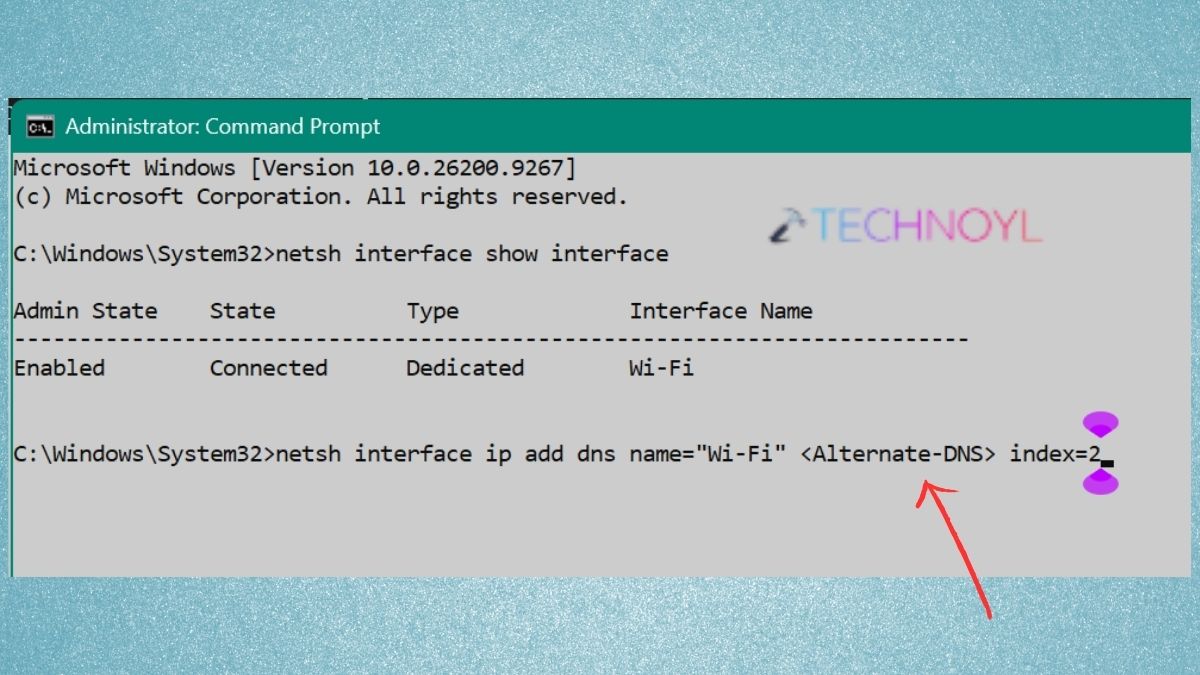
Change Wi-Fi and the DNS to match the ones for your connection.
Method 4: Configure DNS With PowerShell
A more advanced option to configure DNS for advanced users is PowerShell.
1. Click on Start and search for PowerShell. Select Run as administrator.
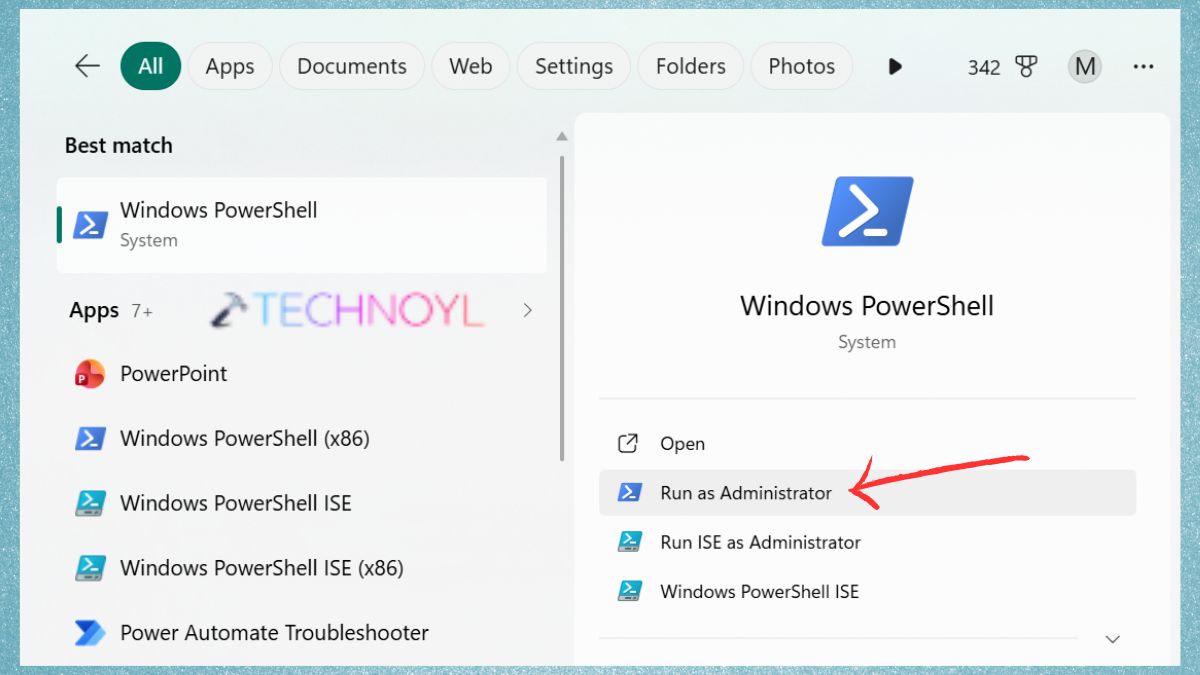
2. Identify the network adapter.
Get-NetAdapter
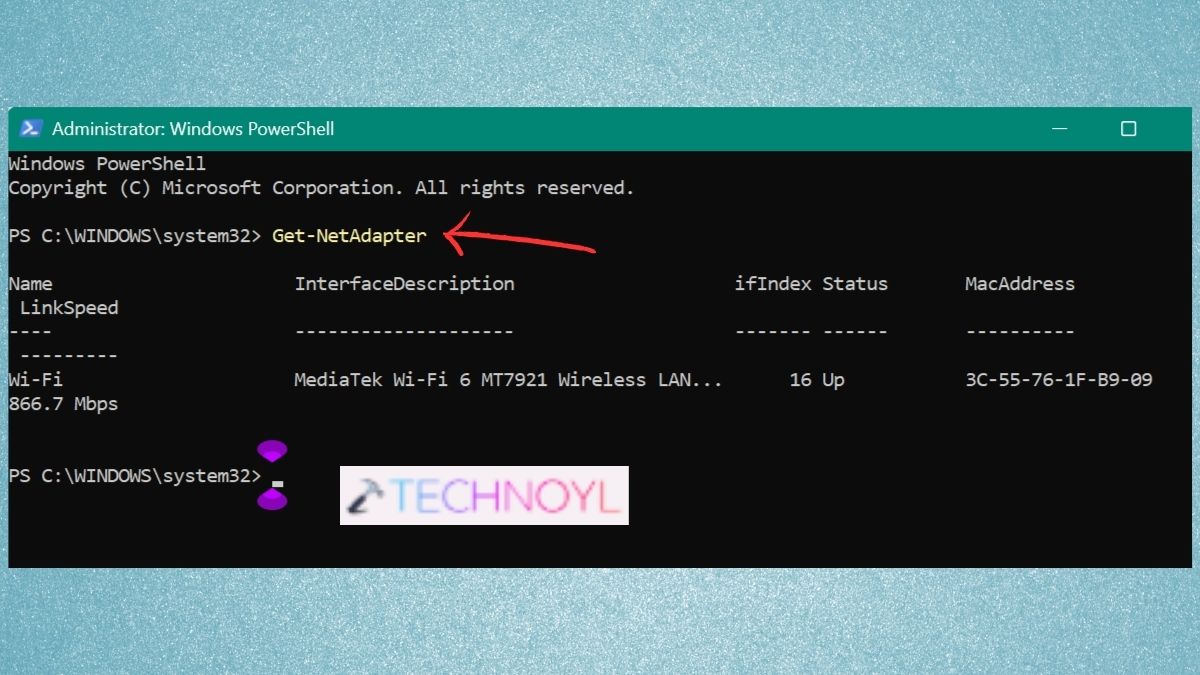
Record the ifIndex of the adapter.
3. Set the DNS server. Press Enter and restart your connection if necessary.
Set-DnsClientServerAddress -InterfaceIndex -ServerAddresses ("","")
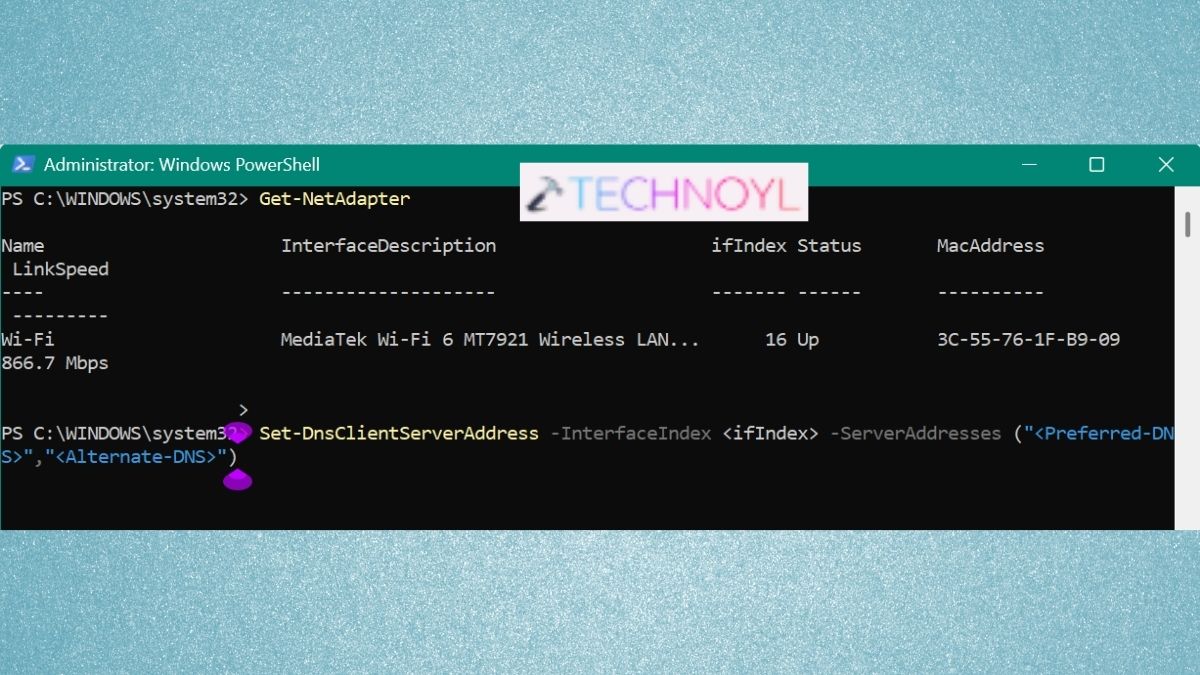
This is especially helpful for Windows 11 network and DNS administrators.
Tip to Check Whether Your DNS Settings Changed
Once DNS has been set up in Windows 11, open a Command Prompt window and type the following:-
ipconfig /all
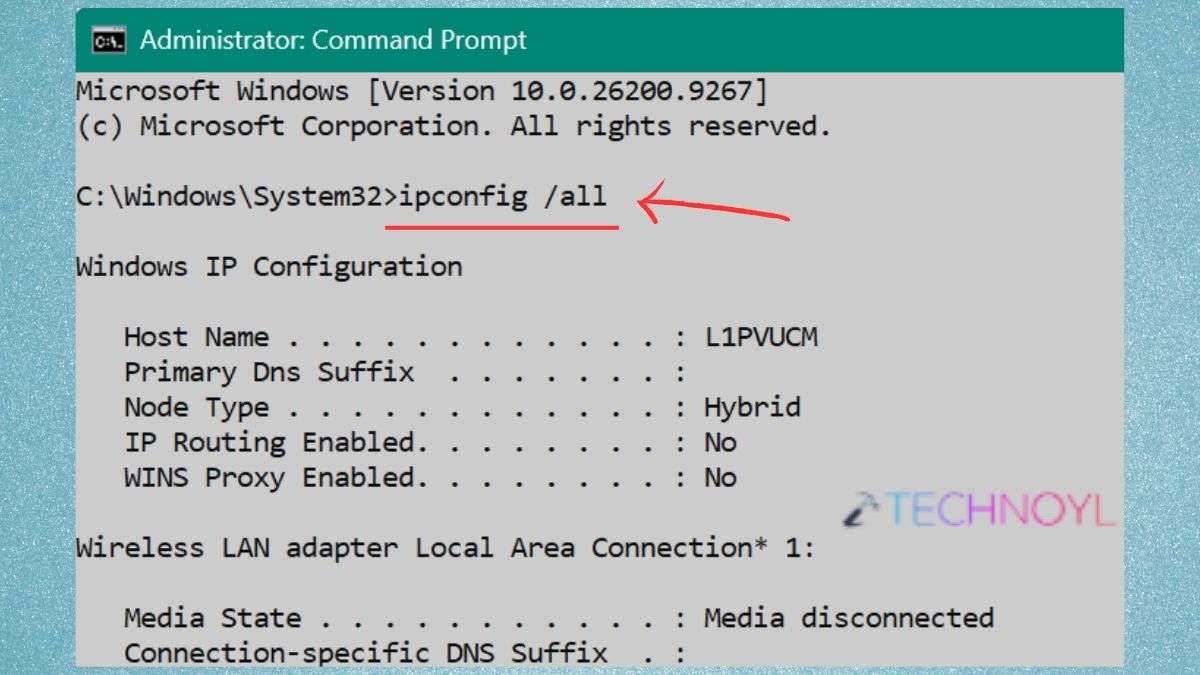
Under your active network adapter, you will see the DNS Servers. This can also be done by running this command:-
nslookup example.com
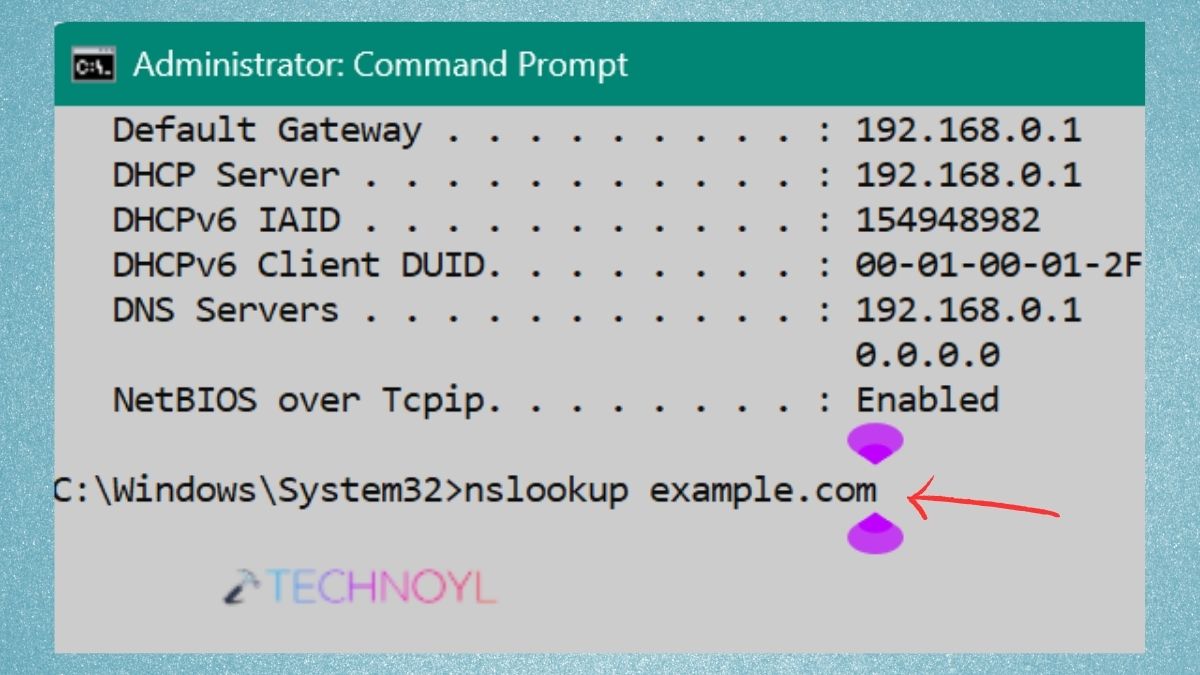
If you can resolve the domain with the command, your DNS setup is most likely OK.
Frequently Asked Questions (FAQs)
What is Private DNS in Windows 11?
Private DNS typically means a DNS service that offers extra privacy, security or filtering. In Windows 11, you can manually set your network connection’s DNS servers.
How do I change DNS in Windows 11?
DNS can be modified in Control Panel, PowerShell, or via Settings; this can be done via Command Prompt. For most of the users, the easiest one is Settings.
Can changing DNS make my internet faster?
Your actual internet bandwidth is not normally affected by changing your DNS, but it could make your domain names resolve faster. The performance is dependent on the network and ISP you’re connected to and the DNS provider you’re using.
What should I do if websites stop opening after changing DNS?
Verify the DNS addresses have been typed in correctly. Additionally, you can reset to Automatic (DHCP) and use an elevated Command Prompt to run ipconfig /flushdns.
That’s it!

Leave a Reply