
Tracking your website traffic is essential if you want to grow your site. With Google Analytics 4 (GA4), you can monitor visitors, understand user behavior, and improve your content strategy.
Add Google Analytics to WordPress Site [2026 Guide]
The good news? Adding Google Analytics to WordPress is easier than ever, and you can do it without coding if you use the right method.
Step 1: Create a Google Analytics Account
First, go to Google Analytics and sign in with your Google account. Click on Start measuring and follow the setup process to create your account.
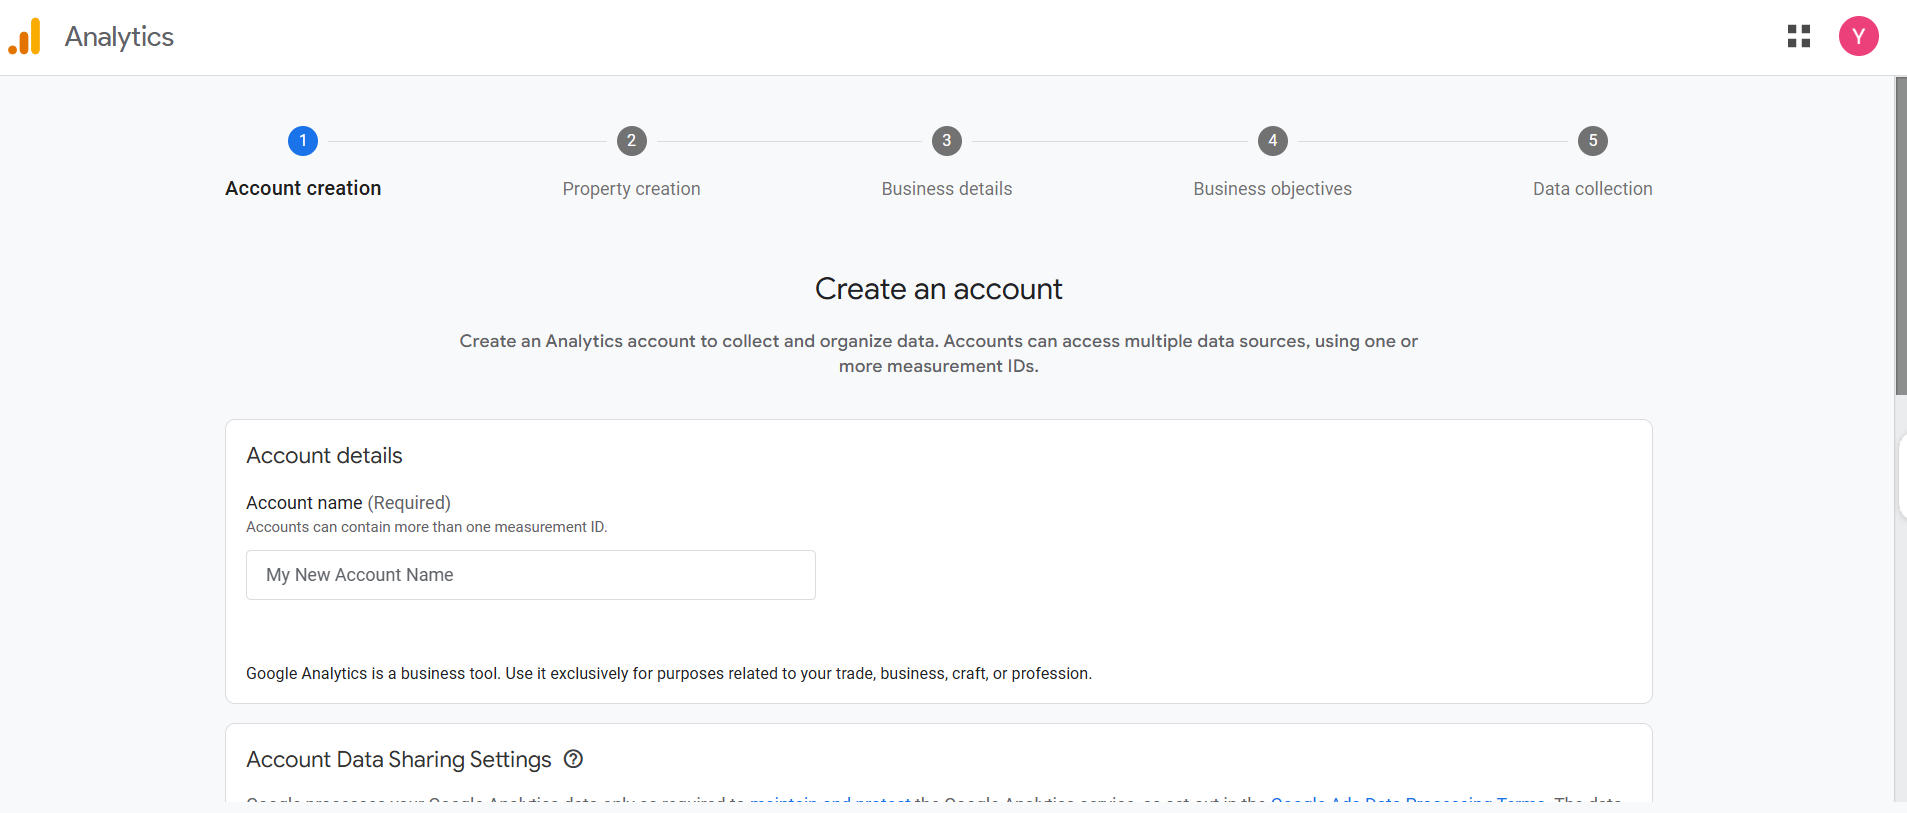
You’ll need to enter basic details like account name, data-sharing settings, and business information. Once done, Google will guide you to create your first property, which represents your website.
Step 2: Set Up a GA4 Property and Data Stream
After creating your account, set up a GA4 property and choose Web as your platform. Then enter your website URL to create a data stream.
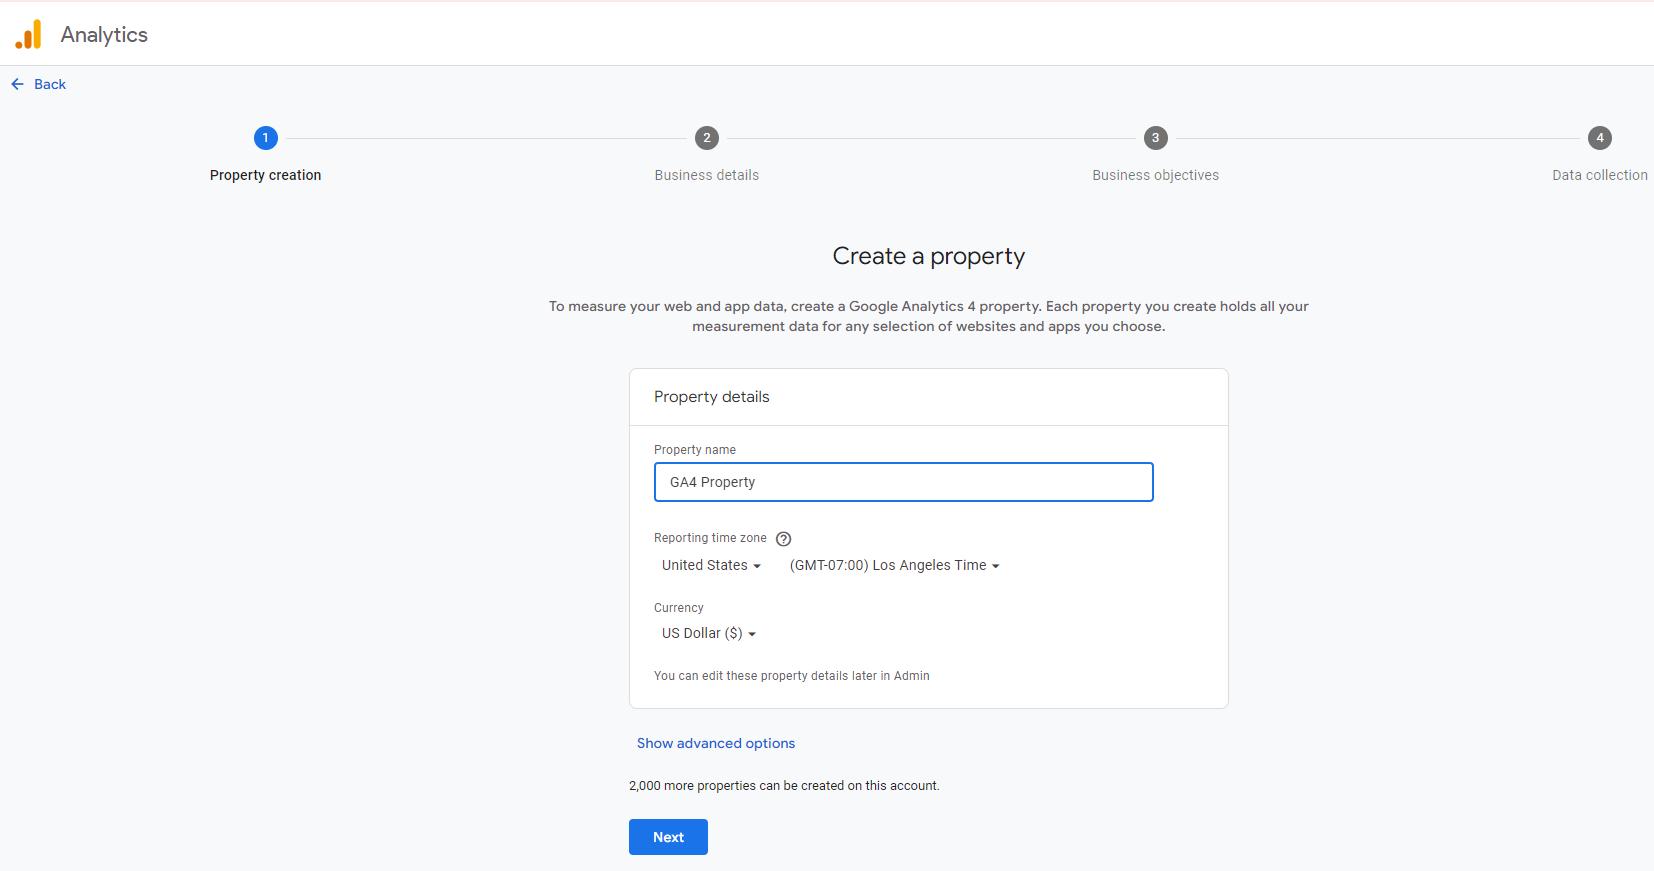
Once completed, you’ll get a Measurement ID (G-XXXX), which connects your WordPress site to Google Analytics. This ID is essential for tracking data.
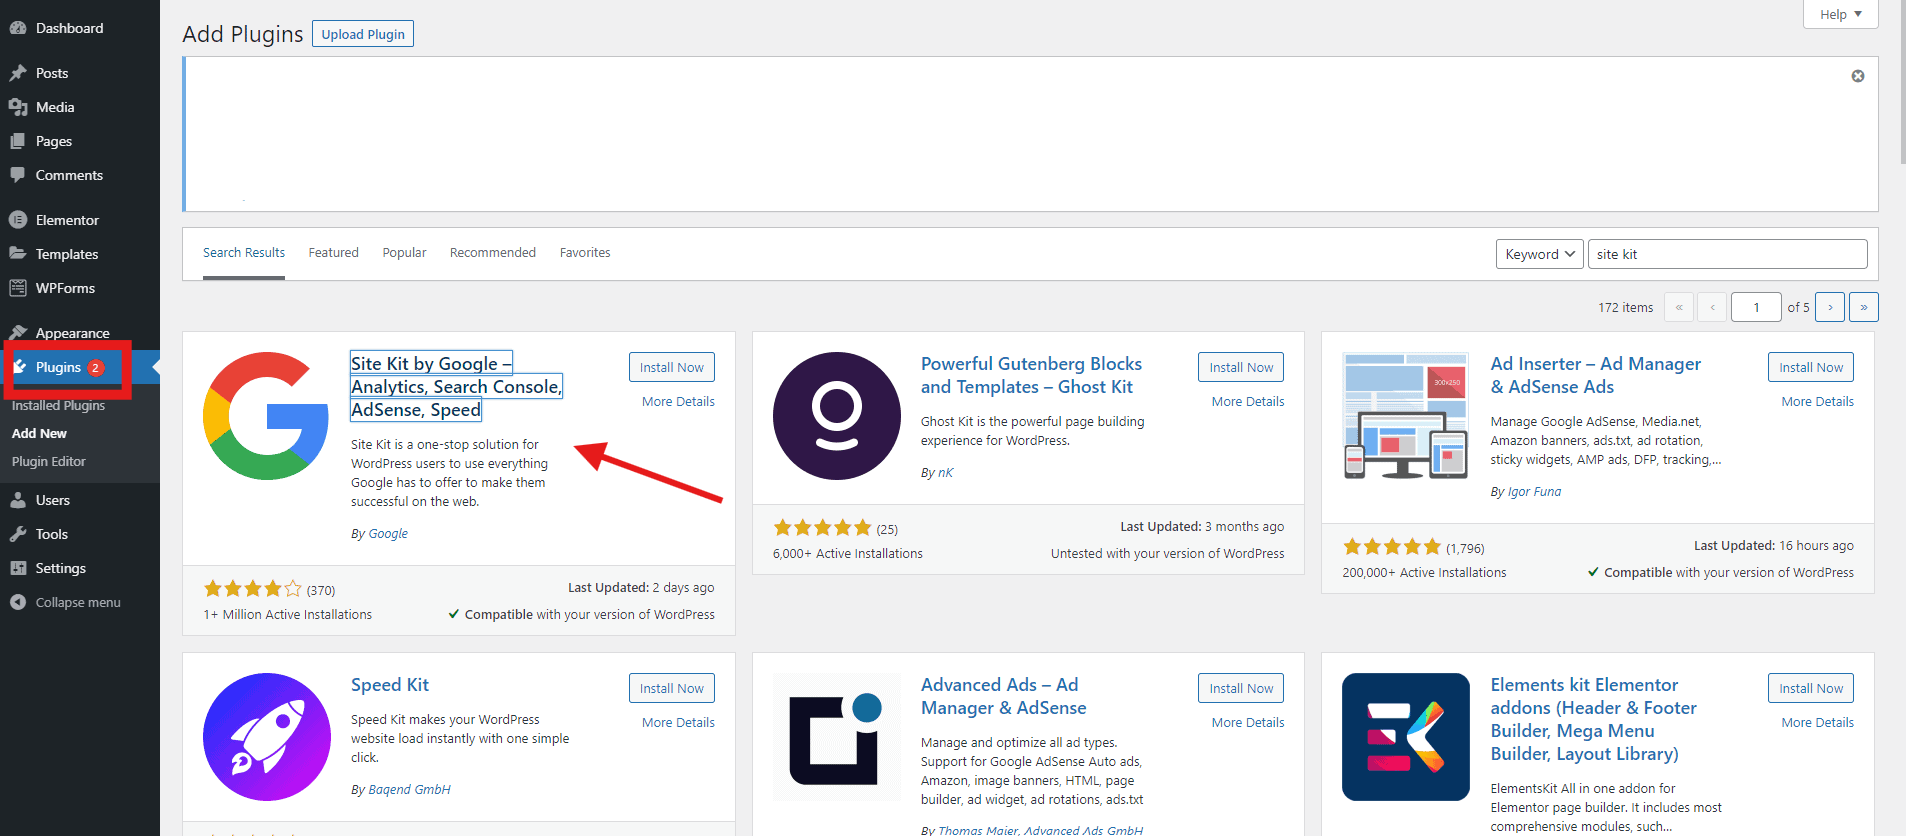
Method 1: Add Google Analytics Using a Plugin (Recommended)
The easiest way to add Google Analytics is by using a plugin like Site Kit or other analytics plugins. Simply install the plugin from your WordPress dashboard and connect it to your Google account.
Most plugins only require you to paste your Measurement ID or sign in via Google, making the process beginner-friendly. This method avoids editing code and ensures proper integration with minimal effort.
Method 2: Add Google Analytics Manually (Using Code)
If you prefer a manual approach, copy the Global Site Tag (tracking code) from Google Analytics and paste it into your website’s header file.
This can be done via the theme editor or by using a header/footer plugin. While this method gives you full control, it requires careful handling to avoid breaking your site.
Method 3: Use Google Site Kit (Official Plugin)
Google’s official Site Kit plugin allows you to connect Analytics directly from your WordPress dashboard. It also integrates with other tools like Search Console and AdSense.
The setup process is guided and straightforward, making it one of the fastest ways to connect to GA4. You can even view analytics data directly inside WordPress.
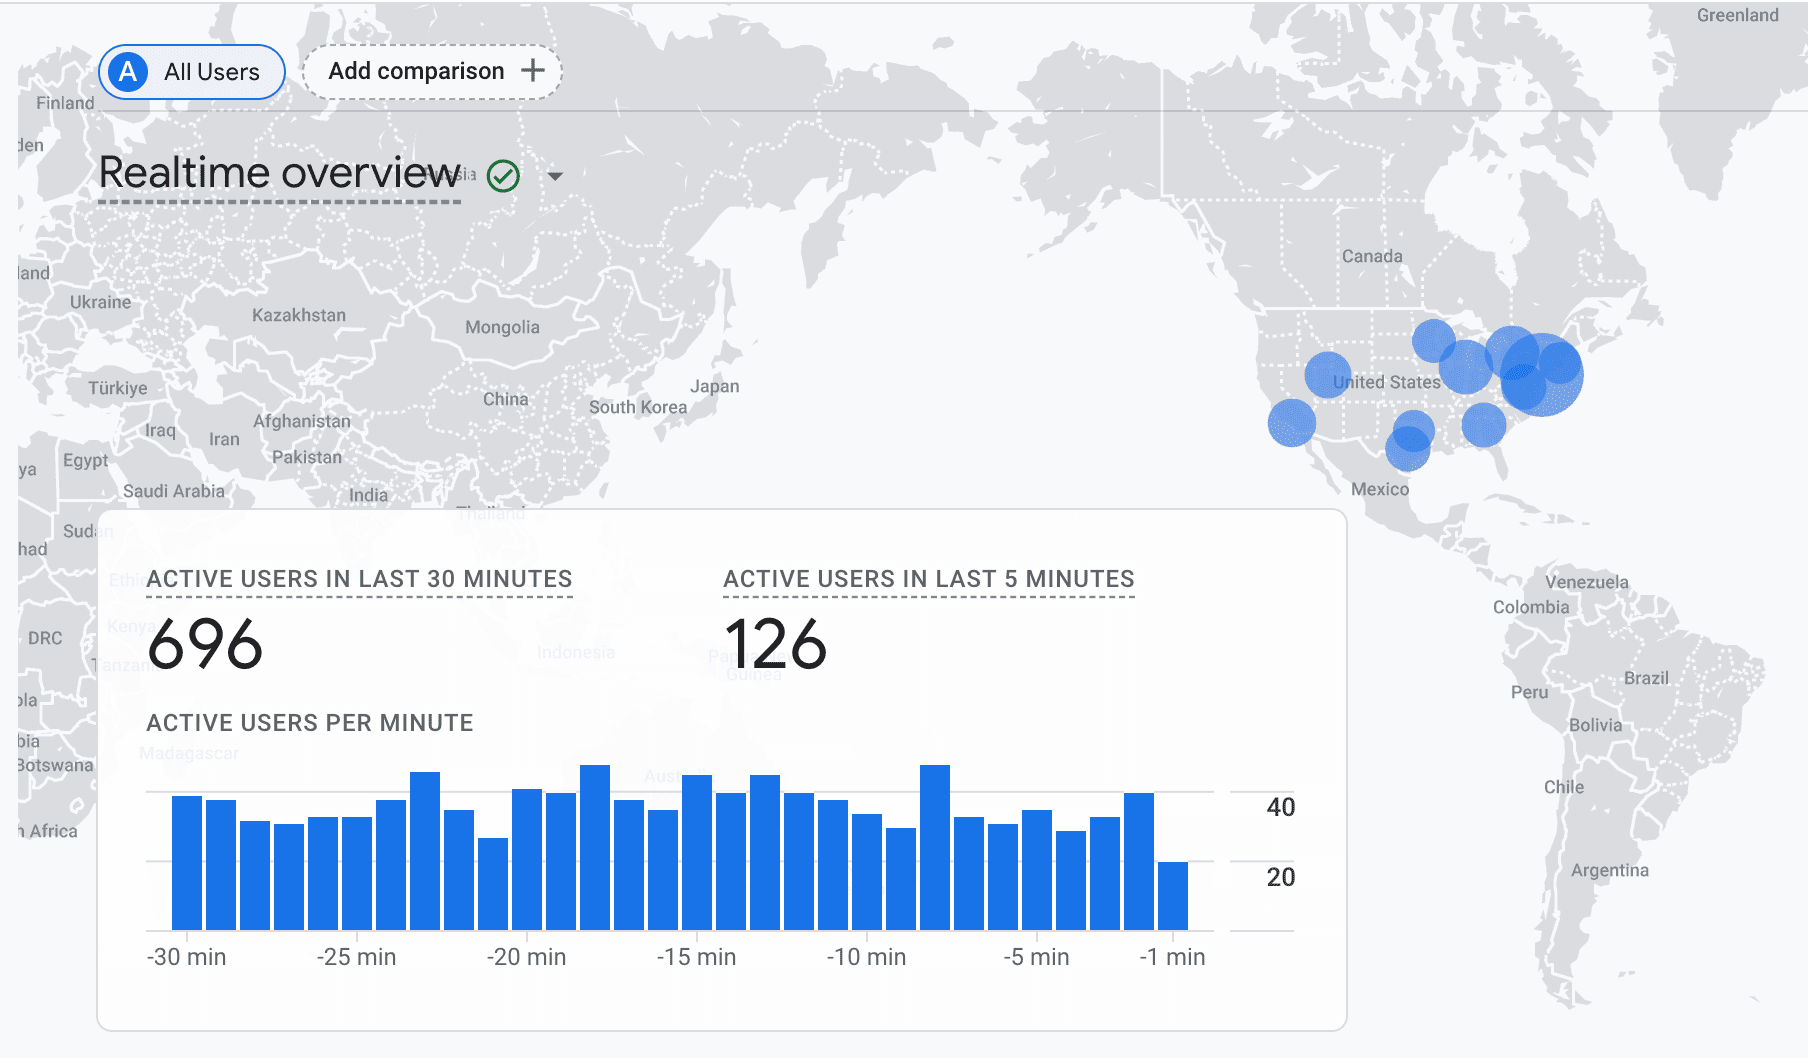
Step 3: Verify Your Tracking
After installation, it’s important to confirm that tracking is working. Open your website in a new tab and check the Realtime report in Google Analytics.
If you see active users (even if it’s just you), your setup is successful. Sometimes it may take a few minutes or hours for data to appear.
Step 4: Start Tracking and Optimizing
Once everything is set up, Google Analytics will start collecting data about your visitors, including traffic sources, page views, and engagement.
You can use these insights to improve SEO, optimize content, and make better business decisions. Over time, this data becomes essential for scaling your website effectively.
Final Thoughts
Adding Google Analytics to WordPress is a must for anyone serious about website growth. Whether you use a plugin, manual code, or Site Kit, the process is straightforward once you understand the basics.
With GA4 in place, you gain valuable insights that help you improve user experience, content strategy, and overall performance.
Leave a Reply