


In Outlook, you can add different type of accounts to manage their emails. If you’re trying to add a new account to your Outlook, especially if it is a Gmail based account, you might receive the error We couldn’t create the Outlook data file. In this guide you will learn, how you can fix this error and resolve the problem.
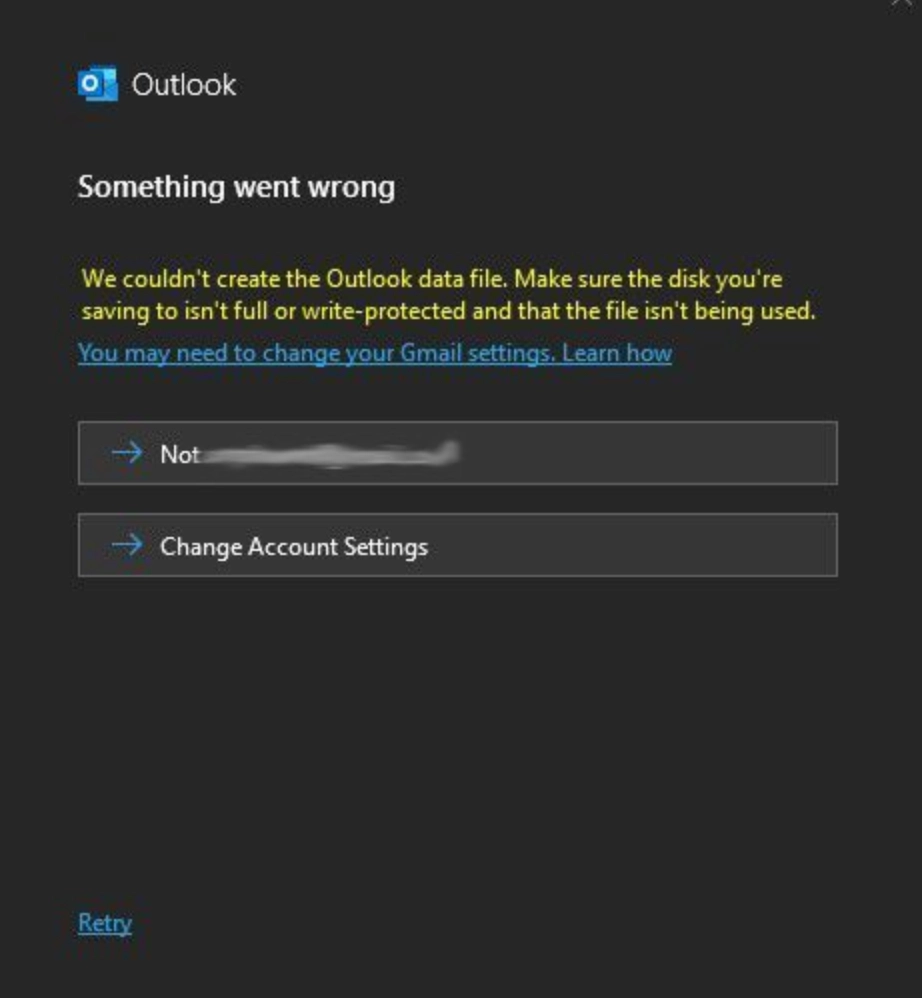
This issue has been reported mostly by Windows users. In this case, when users try to add the new account, the generation of required PST or OST file is not performed. And finally it blocks the setup to add the new account.
Reasons why this could happen
This issue may occur, if either of following is true:
- Corrupted Outlook profile
- Having issues with installation of Microsoft Office
- Issues with Mail in the Control Panel section
Fixing We could not create the Outlook data file
You can use either of the below mentioned fixes to resolve the issue:
Fix 1: Add your account using Manage Profiles
On some systems, this error may appear if you directly try to add account using the dedicated wizard in Outlook. To avoid this, you can try the alternative path and it is going via Manage profiles.
- Open the Outlook app and click on the File.
- Then go to Info > Account Settings > Manage profiles.
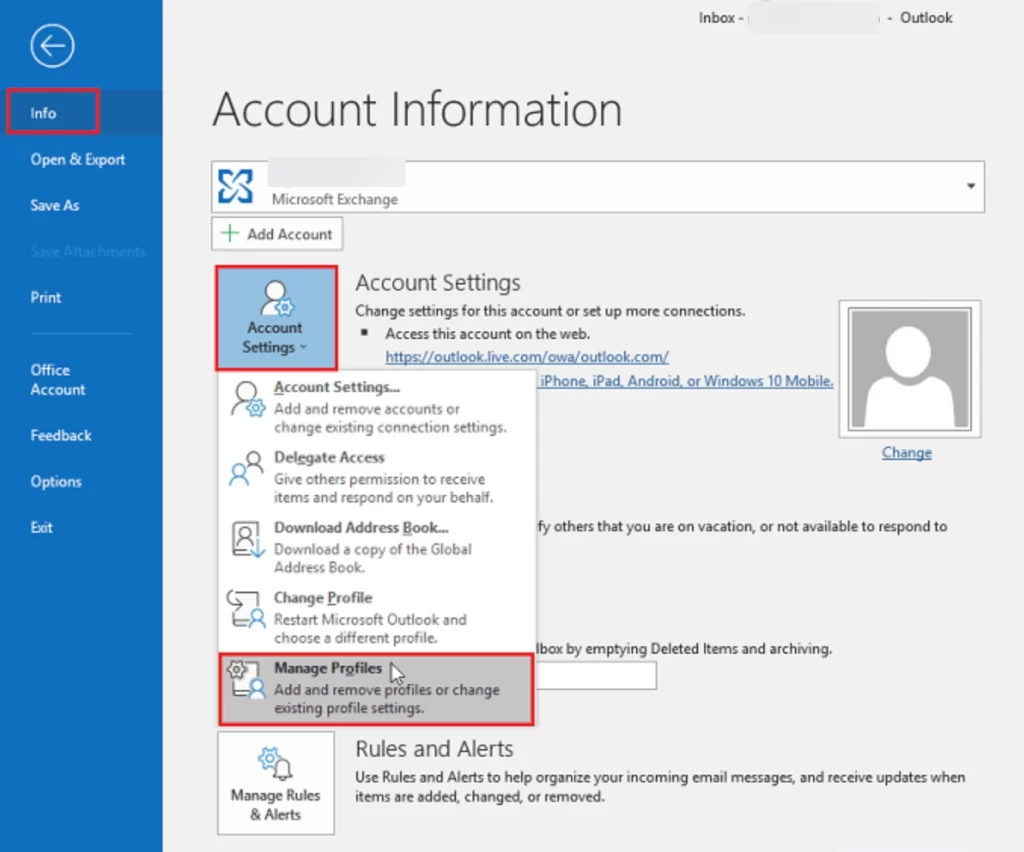
- Now you will see Add account window appearing. In that window choose the Email accounts option.
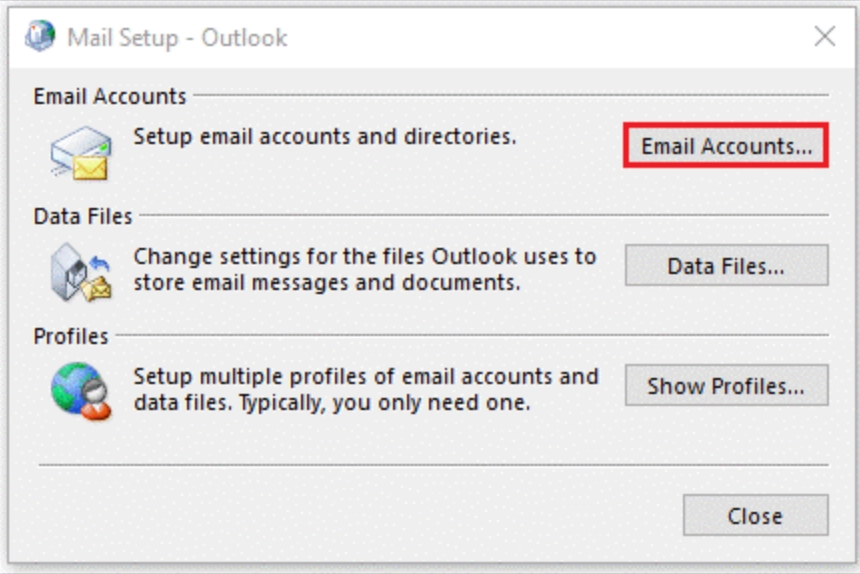
- Now input your details and click Next and follow on screen instructions to complete the wizard.
Fix 2: Add your account using Control Panel
- You can try the alternative method to add a new account to Outlook using Control Panel.
- Open the old classic Control Panel and then click go to all Control Panel items.
- Locate and click Mail (Microsoft Outlook) option.
- Now click on the Email accounts button and then click new and follow the on screen instructions to add the new account.
Fix 3: Using Registry
If previous solutions come didn’t help you, you can try following steps using the registry based manipulation:
- Press Windows + R and regedit and click OK.
- In the registry editor window, go to following registry location: HKEY_CURRENT_USER\SOFTWARE\Microsoft\Office\16.0\Outlook\setup
- In the right pane of set up registry key, right click and select new > DWORD value. Name the newly created registry DWORD as DisableOffice365SimplifiedAccountCreation.
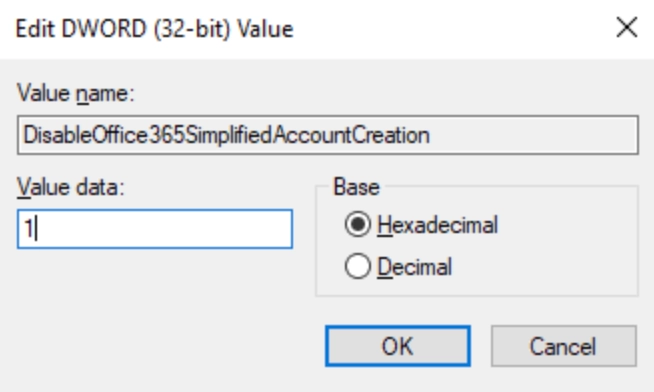
- Double click on this newly created registry DWORD and set its value data to 1.
- Close the Registry Editor and restart your system to make the changes effective.
After trying about solutions, we hope this issue would be finally resolved for you.
In case if you still faced the issue, do let us know via your comments and we would be happy to help you!

Leave a Reply