
Automatic updates in WordPress sounds helpful. But sometimes, they create problems when you least expect them. A plugin update may suddenly break your site. Some new issues you were not expericencing before, might appear after update. A theme update may remove custom changes. Many website owners prefer to update things manually after testing them first.
If you want more control over your website, here’s how to disable automatic updates in WordPress safely.
Should You Disable Automatic Updates In WordPress?
For small blogs or simple websites, automatic updates are usually safe and helpful.
But for:
- Online stores
- Business websites
- Custom-built WordPress sites
Manual updates can be safer, because you can test everything first and then apply the update to production environment.
Disable Automatic Updates In WordPress
Below are two simple methods to disable automatic updates.
Method 1: Disable Automatic Updates Using WPCode
This is the easiest and safest method for beginners.
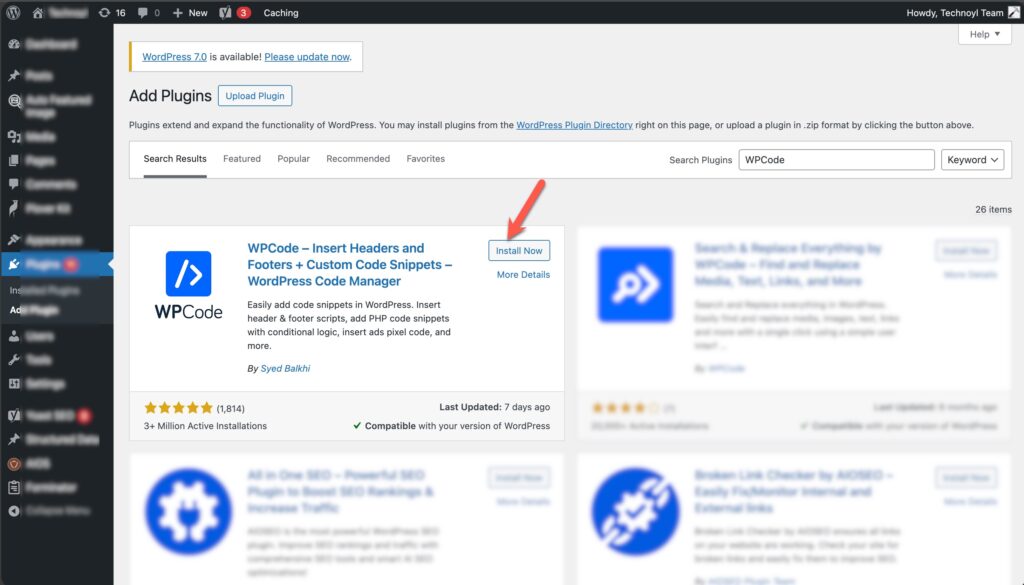
1: Install WPCode
- Open your WordPress dashboard.
- Go to Plugins > Add New.
- Search for WPCode.
- Install and activate the plugin.
2: Add The Snippet
- Go to Code Snippets > Library.
- Search for Disable Automatic Updates.
- Click Use Snippet.
3: Enable The Snippet
You will see options for:
- Core updates
- Plugin updates
- Theme updates
You can keep or remove any filter depending on what you want to disable.
Now:
- Turn the snippet from Inactive to Active.
- Click Update.
4. Manual Code Method
You can also manually use this code inside the wp-config.php file:
define( 'WP_AUTO_UPDATE_CORE', false );
This disables automatic WordPress core updates.
To disable automatic plugin updates, use:
add_filter( 'auto_update_plugin', '__return_false' );
To disable automatic theme updates, use:
add_filter( 'auto_update_theme', '__return_false' );
That’s it. Automatic updates are now disabled.
Method 2: Disable Updates Using Easy Updates Manager
If you want more update controls, this plugin is useful.
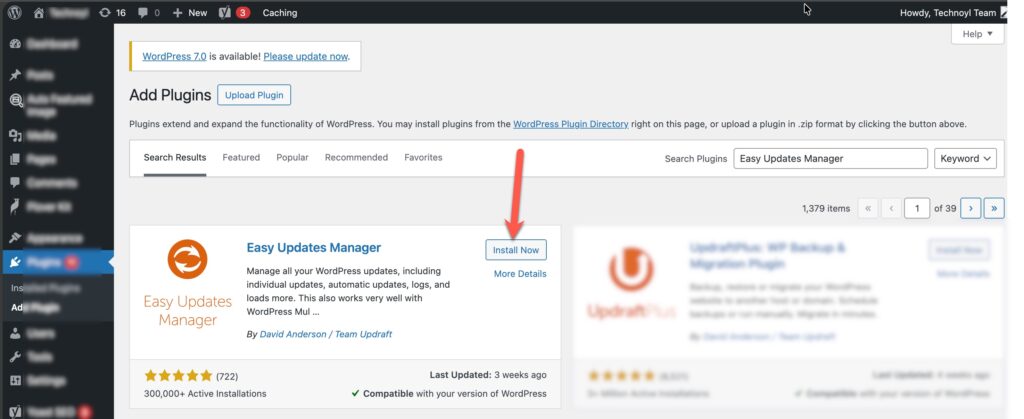
1: Install The Plugin
- Go to Plugins > Add New.
- Search for Easy Updates Manager.
- Install and activate it.
2: Configure Update Settings
- Open Dashboard > Updates Options.
- Choose what you want to disable.
You can:
- Disable plugin auto-updates.
- Disable theme auto-updates.
- Keep minor WordPress core updates enabled.
This method also keeps update logs, which helps if something breaks after an update.
Lastly, just remember one thing. If you disable automatic updates, always update WordPress manually and keep regular backups of your website.
Have questions? Drop comments below and we’ll be happy to answer!
Leave a Reply