
You can integrate Hugging Face with GitHub and this brings some advantages we’ll discuss in this post. This integration helps developers manage AI projects more efficiently. It will bring version control and machine learning workflows together. Now instead of uploading models or app files manually, you can sync repositories automatically. This helps you to collaborate with your team more easily. The best part is you can deploy updates directly from GitHub.
Integrate Hugging Face with GitHub: Complete Beginner’s Guide
What You Need Before Starting
Before connecting Hugging Face with GitHub, make sure you have the following:
- A GitHub account.
- A Hugging Face account.
- Git is installed on your system.
- Python is installed, which is optional but recommended for AI projects.
You can check whether Git is installed by opening Command Prompt or Terminal and running:
git --version
If Git is installed correctly, the system will show the version number. Git is important because both GitHub and Hugging Face rely on repositories for version control and syncing.
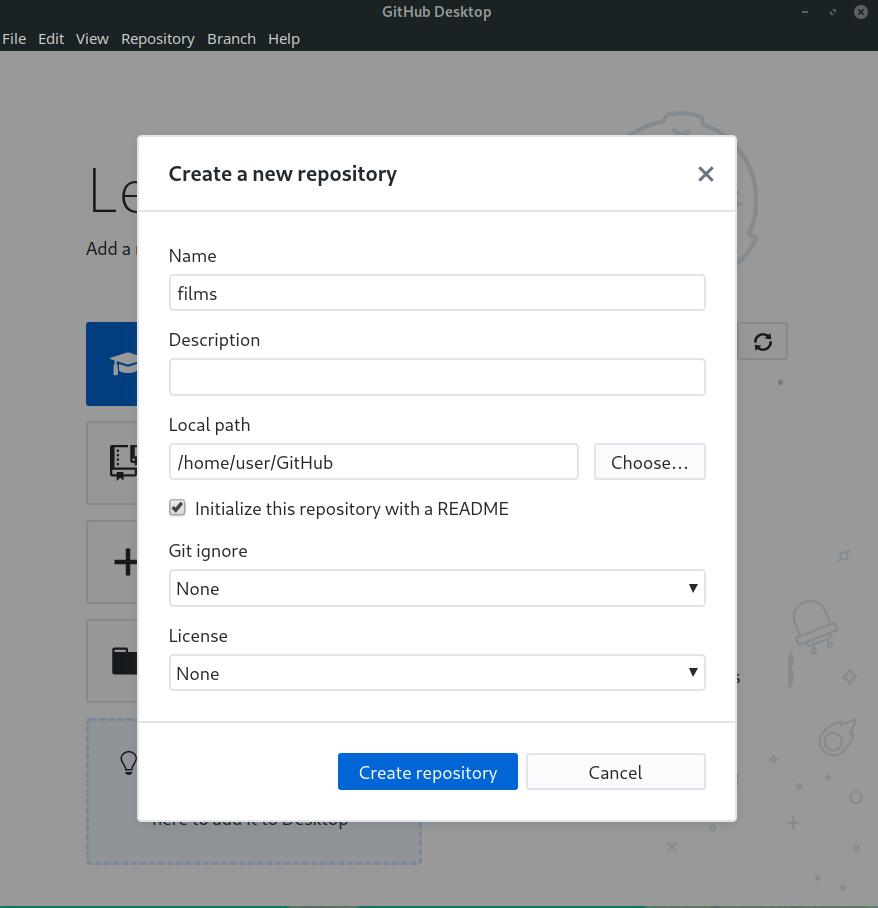
Step 1: Create a GitHub Repository
Start by signing in to your GitHub account. Click the + icon in the top-right corner and select New repository.
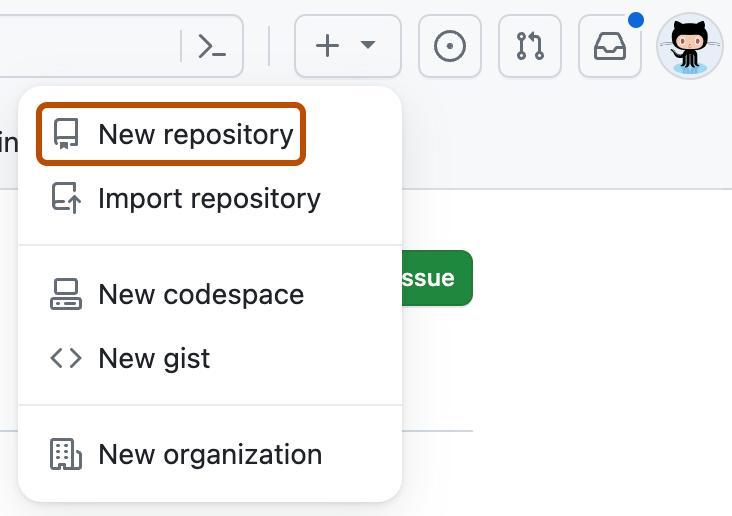
Enter a repository name and, if needed, add a short description. Choose whether the repository should be public or private, then click Create repository.
Your GitHub repository will serve as the main place for your AI project files, scripts, workflows, and model configurations. It also makes it easier to track changes, collaborate with others, and automate deployments later.
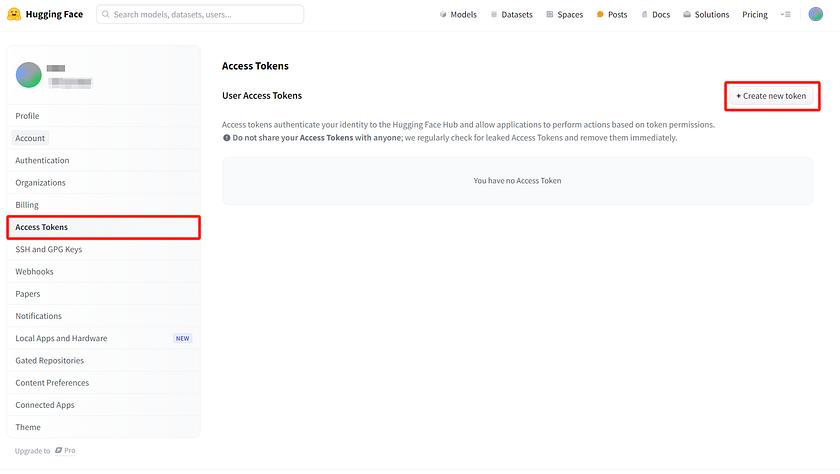
Step 2: Generate a Hugging Face Access Token
Next, log in to your Hugging Face account.
Open Settings from your profile menu.
Go to Access Tokens and click Create new token.
Give the token a name and select Write permission. After that, copy the token and store it securely.
This token allows GitHub to communicate securely with your Hugging Face repository or Space. Without it, GitHub Actions will not have permission to upload or sync files automatically.
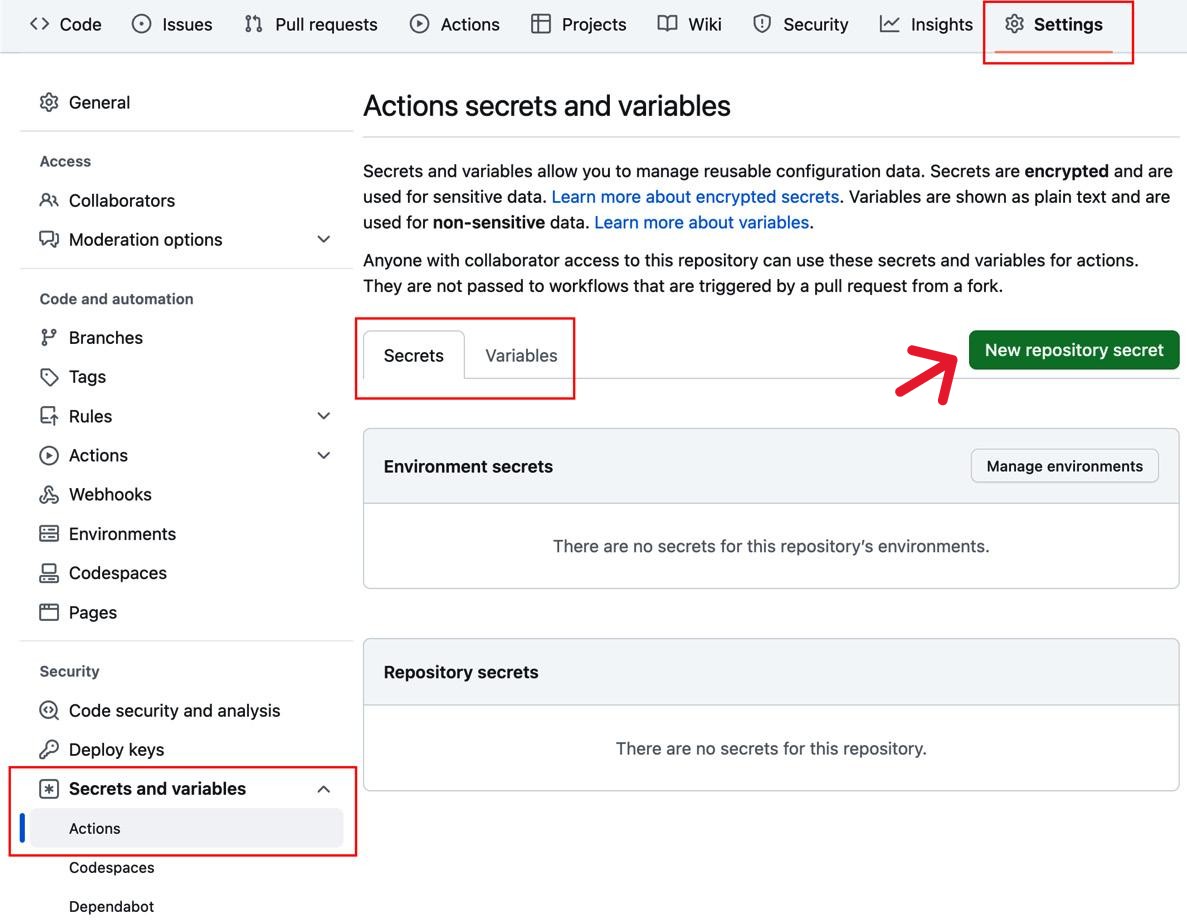
Step 3: Store the Token in GitHub Secrets
Open your GitHub repository and go to Settings. From there, click Secrets and variables, then choose Actions.
Select New repository secret, name itHF_TOKEN, and paste your Hugging Face access token. Save the secret once you are done.
GitHub Secrets are used to store sensitive information like API keys and tokens safely. This is much better than placing credentials directly inside scripts or workflow files.
Step 4: Clone the Repository Locally to Integrate Hugging Face with GitHub
Go to your GitHub repository page and copy the repository URL. Then open Terminal or Command Prompt on your computer.
Run:
git clone YOUR_GITHUB_REPO_URL
After cloning, move into the repository folder:
cd YOUR_REPOSITORY_NAME
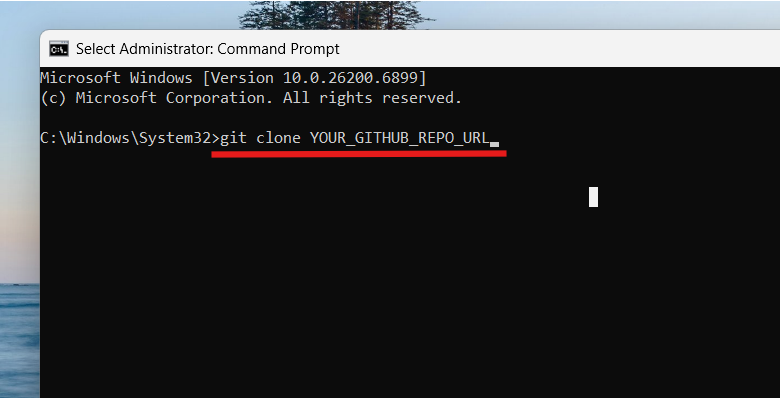
Cloning creates a local copy of your GitHub repository on your computer. This lets you add AI scripts, datasets, notebooks, and Hugging Face integration files directly from your own development setup.
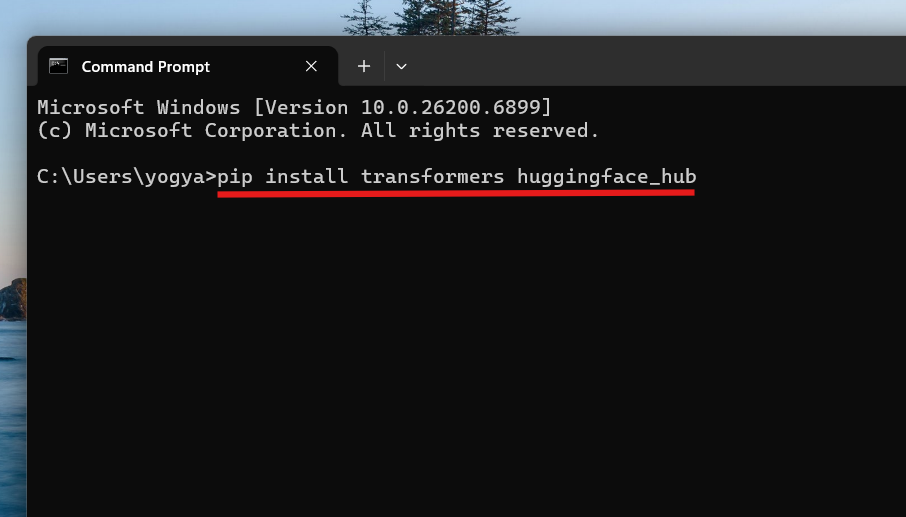
Step 5: Install Hugging Face Libraries
Open Terminal or Command Prompt and install the required libraries with:
pip install transformers huggingface_hub
Wait for the installation to finish. The transformers library gives you access to thousands of pre-trained AI models, while huggingface_hub helps you interact directly with Hugging Face repositories and Spaces.
Step 6: Create a Simple Hugging Face Script
Create a new Python file named model_script.py and add this code:
classifier = pipeline("sentiment-analysis")

result = classifier("I love using Hugging Face!")

print(result)
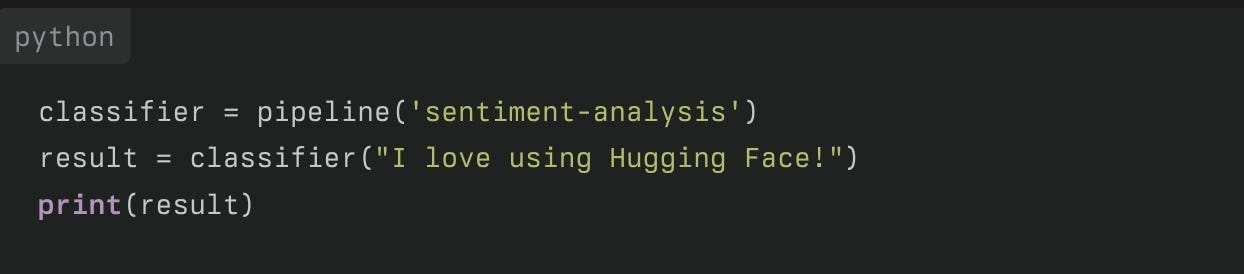
Save the file inside your repository folder.
This script loads a pre-trained sentiment analysis model from Hugging Face and runs a simple prediction. It is a beginner-friendly way to check whether the integration is working properly.
Step 7: Push Your Files to GitHub to Integrate Hugging Face with GitHub
Open Terminal inside your repository folder and run the following commands one by one:
git add .
git commit -m "Add Hugging Face integration"
git push origin main

Then refresh your GitHub repository page to confirm that the files were uploaded successfully.
This step sends your scripts and project files to GitHub, making them available for version control, collaboration, and automated deployment workflows.
Step 8: Automate Sync with GitHub Actions
Inside your repository, create this folder structure:
github/workflows
Then create a file named sync-to-hub.yml.

Add the following workflow configuration:
name: Sync to Hugging Face Hub

on:
push:
branches: [main]

jobs:
sync:
runs-on: ubuntu-latest
steps:
- uses: actions/checkout@v4

- uses: huggingface/[email protected]
with:
github_repo_id: ${{ github.repository }}
huggingface_repo_id: username/repository-name
hf_token: ${{ secrets.HF_TOKEN }}
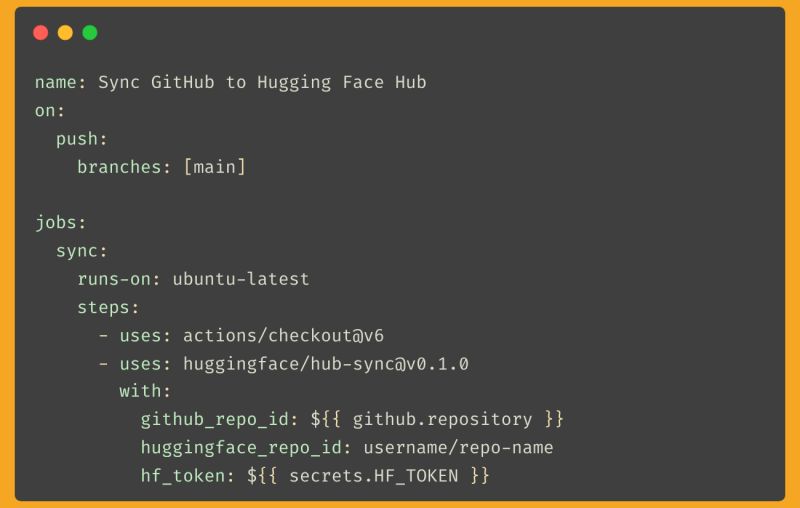
Save the file and push it to GitHub.
GitHub Actions will now sync your repository with Hugging Face whenever new changes are pushed. This removes the need for manual uploads and makes deployment easier for Spaces, models, and datasets.
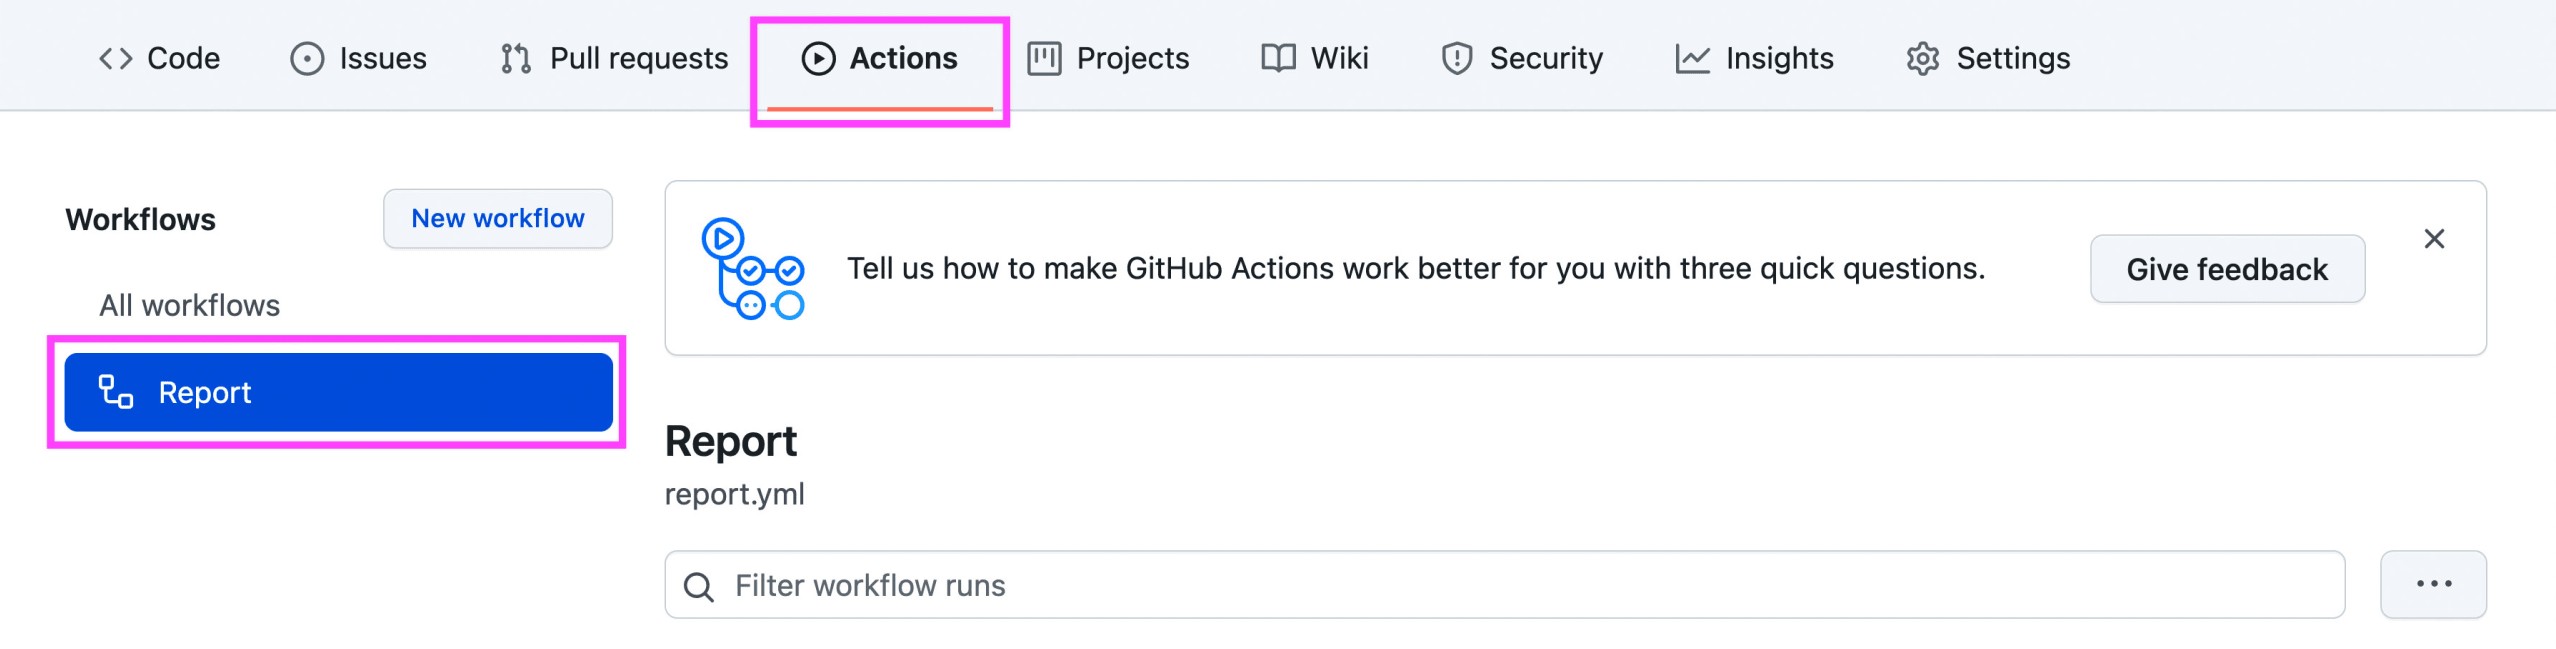
Step 9: Verify the Integration
Open the Actions tab in your GitHub repository and check whether the workflow completed successfully. Then visit your Hugging Face repository or Space and confirm that the latest files were synced correctly.
If everything is set up properly, your GitHub repository and Hugging Face project will stay synchronized automatically whenever updates are pushed.
That’s it!
Leave a Reply